PCB (Tiny Tapeout 4 and onwards)
PCB for TT04 and beyond
Breakout board
PCB files: https://github.com/TinyTapeout/breakout-pcb
Chips are mounted on a breakout board, we expect all TT chips to be in QFN.
The breakout board makes it easy to:
- access all the chip signals
- build your own motherboard without having to solder a bare ASIC chip
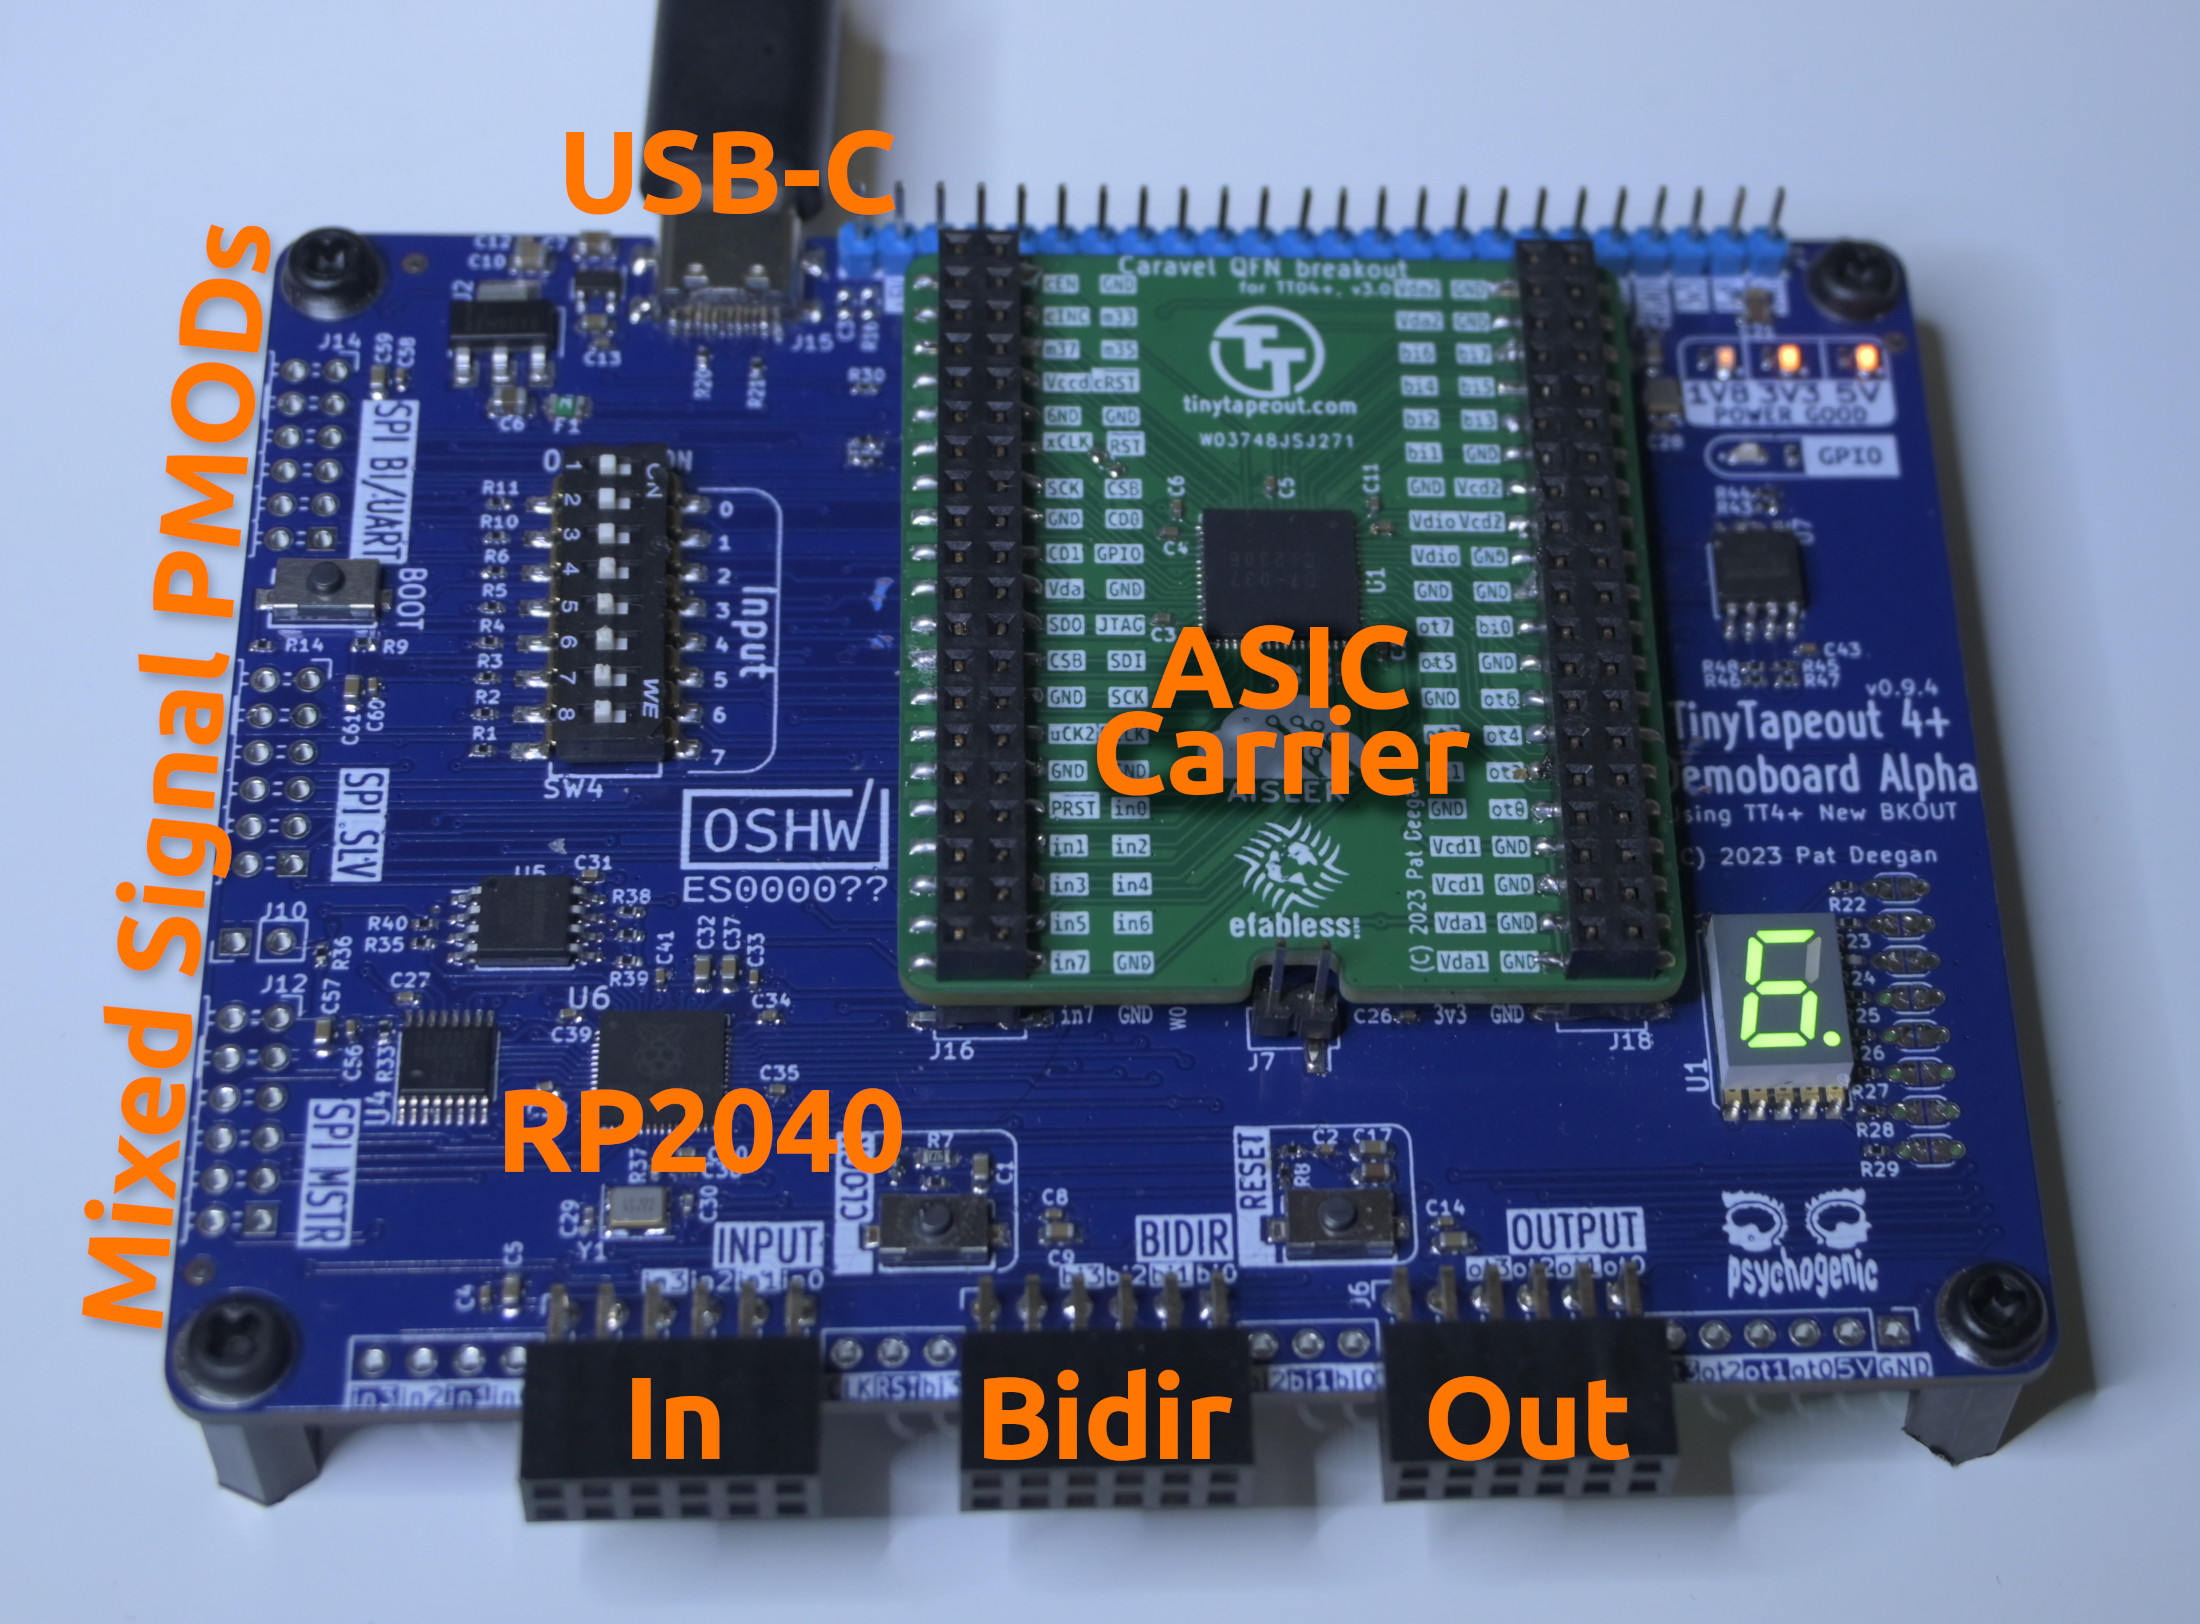
Demo board
The demo board is a work in progress: https://github.com/TinyTapeout/tt-demo-pcb
The main features of the demo board are:
-
hosts and powers the ASIC breakout;
-
includes facilities to interact with projects “stand-alone” (input DIP switches and 7-segment output display);
-
has an RP2040 microcontroller (same chip that powers the Raspberry Pi Pico), to select and optionally interact with projects;
-
has a USB Type-C connector, for powering the board and to interact with the RP2040; and
-
provides a number of means to interact with the demoboard and projects from external circuitry.
RP2040 on-board MCU
From TT04 onwards, the demoboard will include an RP2040 MCU and supporting components (such as flash memory) to:
- select the active design
- generate the clock signal for your design, up to 50 MHz
- provide SPI RAM emulation, up to 512 Kbit
The RP2040 can provide a MicroPython environment, and we’ve created a TT4+ MicroPython SDK which simplifies configuring, selecting and interacting with projects.
The RP2040 is clocked at 12MHz, but has a PLL which is used to increase the system clock greatly. Prototype testing has shown it to be possible to clock the RP2040 itself well over 150MHz.
Synchronous logic projects may be clocked using the RP2040, and the demoboard allows project selection as well as driving the project inputs and bi-directional pins, and reading bi-directional pins and outputs.
USB connection
In addition to providing power, the USB port connects the USB 2.0 data lines to the RP2040. This allows communications between computer and MCU, as well as updating the RP2040 firmware (using the boot button during powerup).
When MicroPython is installed, this can be a simple REPL interface to the python interpreter, allowing manual project selection and control, or other types of serial interfaces.
Connections and extensions
Creating add-on hardware and interacting with the demoboard and projects from off-board is supported in two ways:
-
PMODs for pluggable peripherals; and
-
single inline headers to expose pretty much everything.
PMODs
Off-board interaction with the I/O is possible through various headers, including PMODs using standard spacing.
Two sets of PMODs are on the demoboard:
-
a simple in, bidirectional, and out trio (bottom of image above); and
-
another set which provide mixes of inputs and outputs to facilitate interactions with existing PMOD-compatible peripherals.
SILs
The bottom row of PMODs is laid out with additional pins to provide access to all the I/O in a single line.
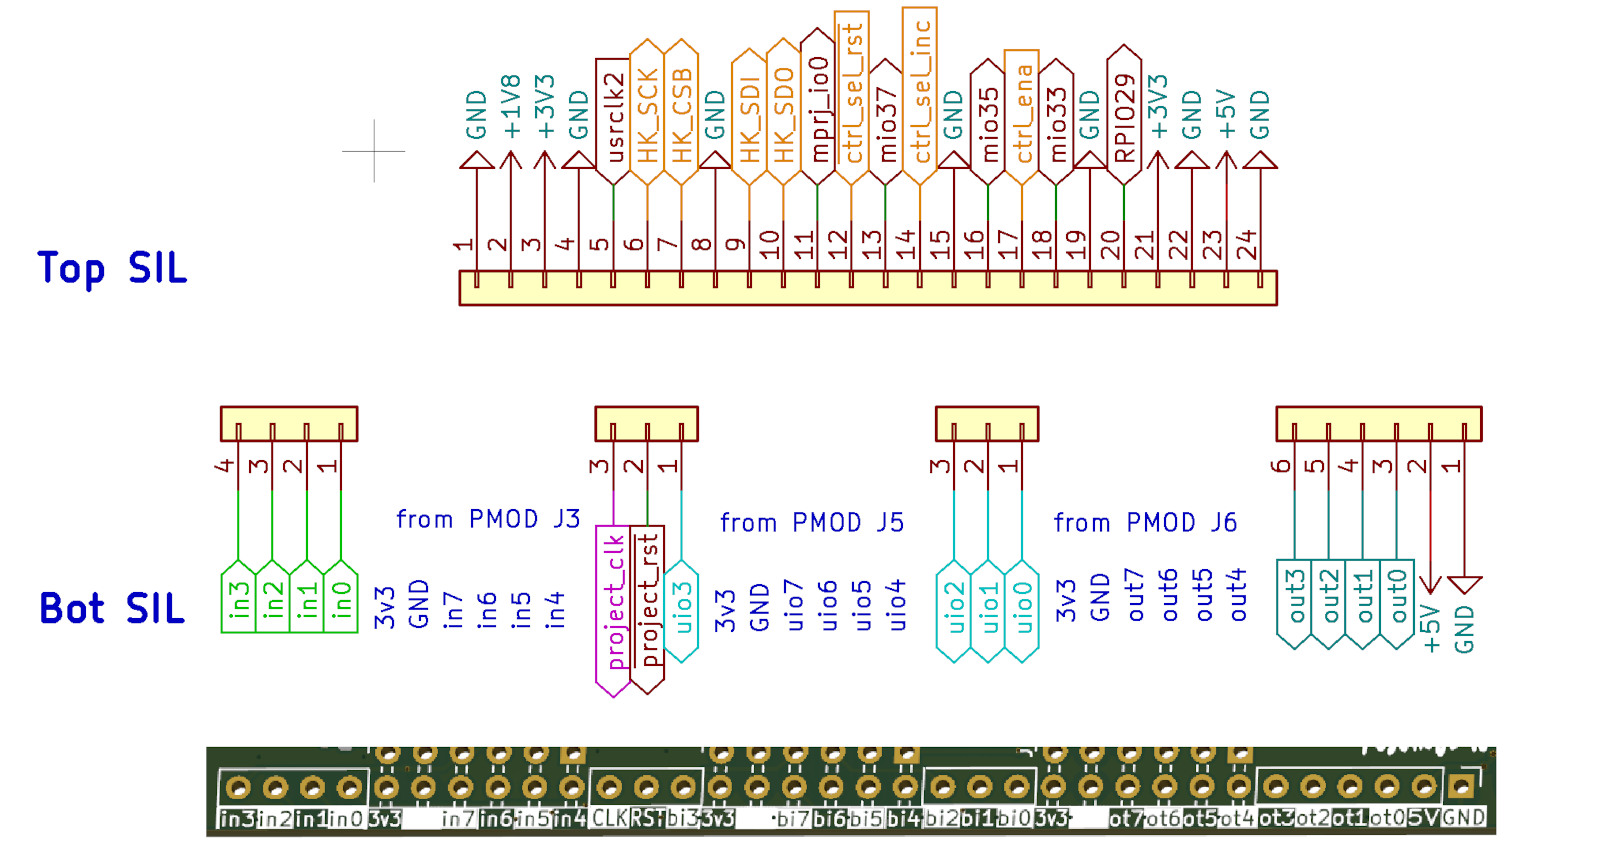
TT04 offboard connection headers
In addition, another 1x24 pin header is laid out put top that gives access to power and MUX control lines.
Note: you should avoid conflicting with the RP2040 when using external signals to interact with the projects or control MUX. See the SDK documentation for information on the RP2040 modes of operation.