Wokwi to GDS
This guide will walk you through the process of preparing your Wokwi design for submission using the Tiny Tapeout GitHub template. We’ll cover the necessary steps to convert your design into the ASIC files required for chip manufacturing and also view your files with the 3d viewer.
Prerequisites
- Wokwi Project: the project must have been started from the Tiny Tapeout Wokwi template.
- GitHub Account: If you don’t have a GitHub account, sign up for one from here.
Use the GitHub Template
GitHub templates are a collection of files with a predefined structure. Ours contains all the files and settings necessary to convert your design to the GDS we need for manufacture.
-
Go to the Wokwi Template
-
Click the ‘Use this template’ button to generate your own copy of the repository.

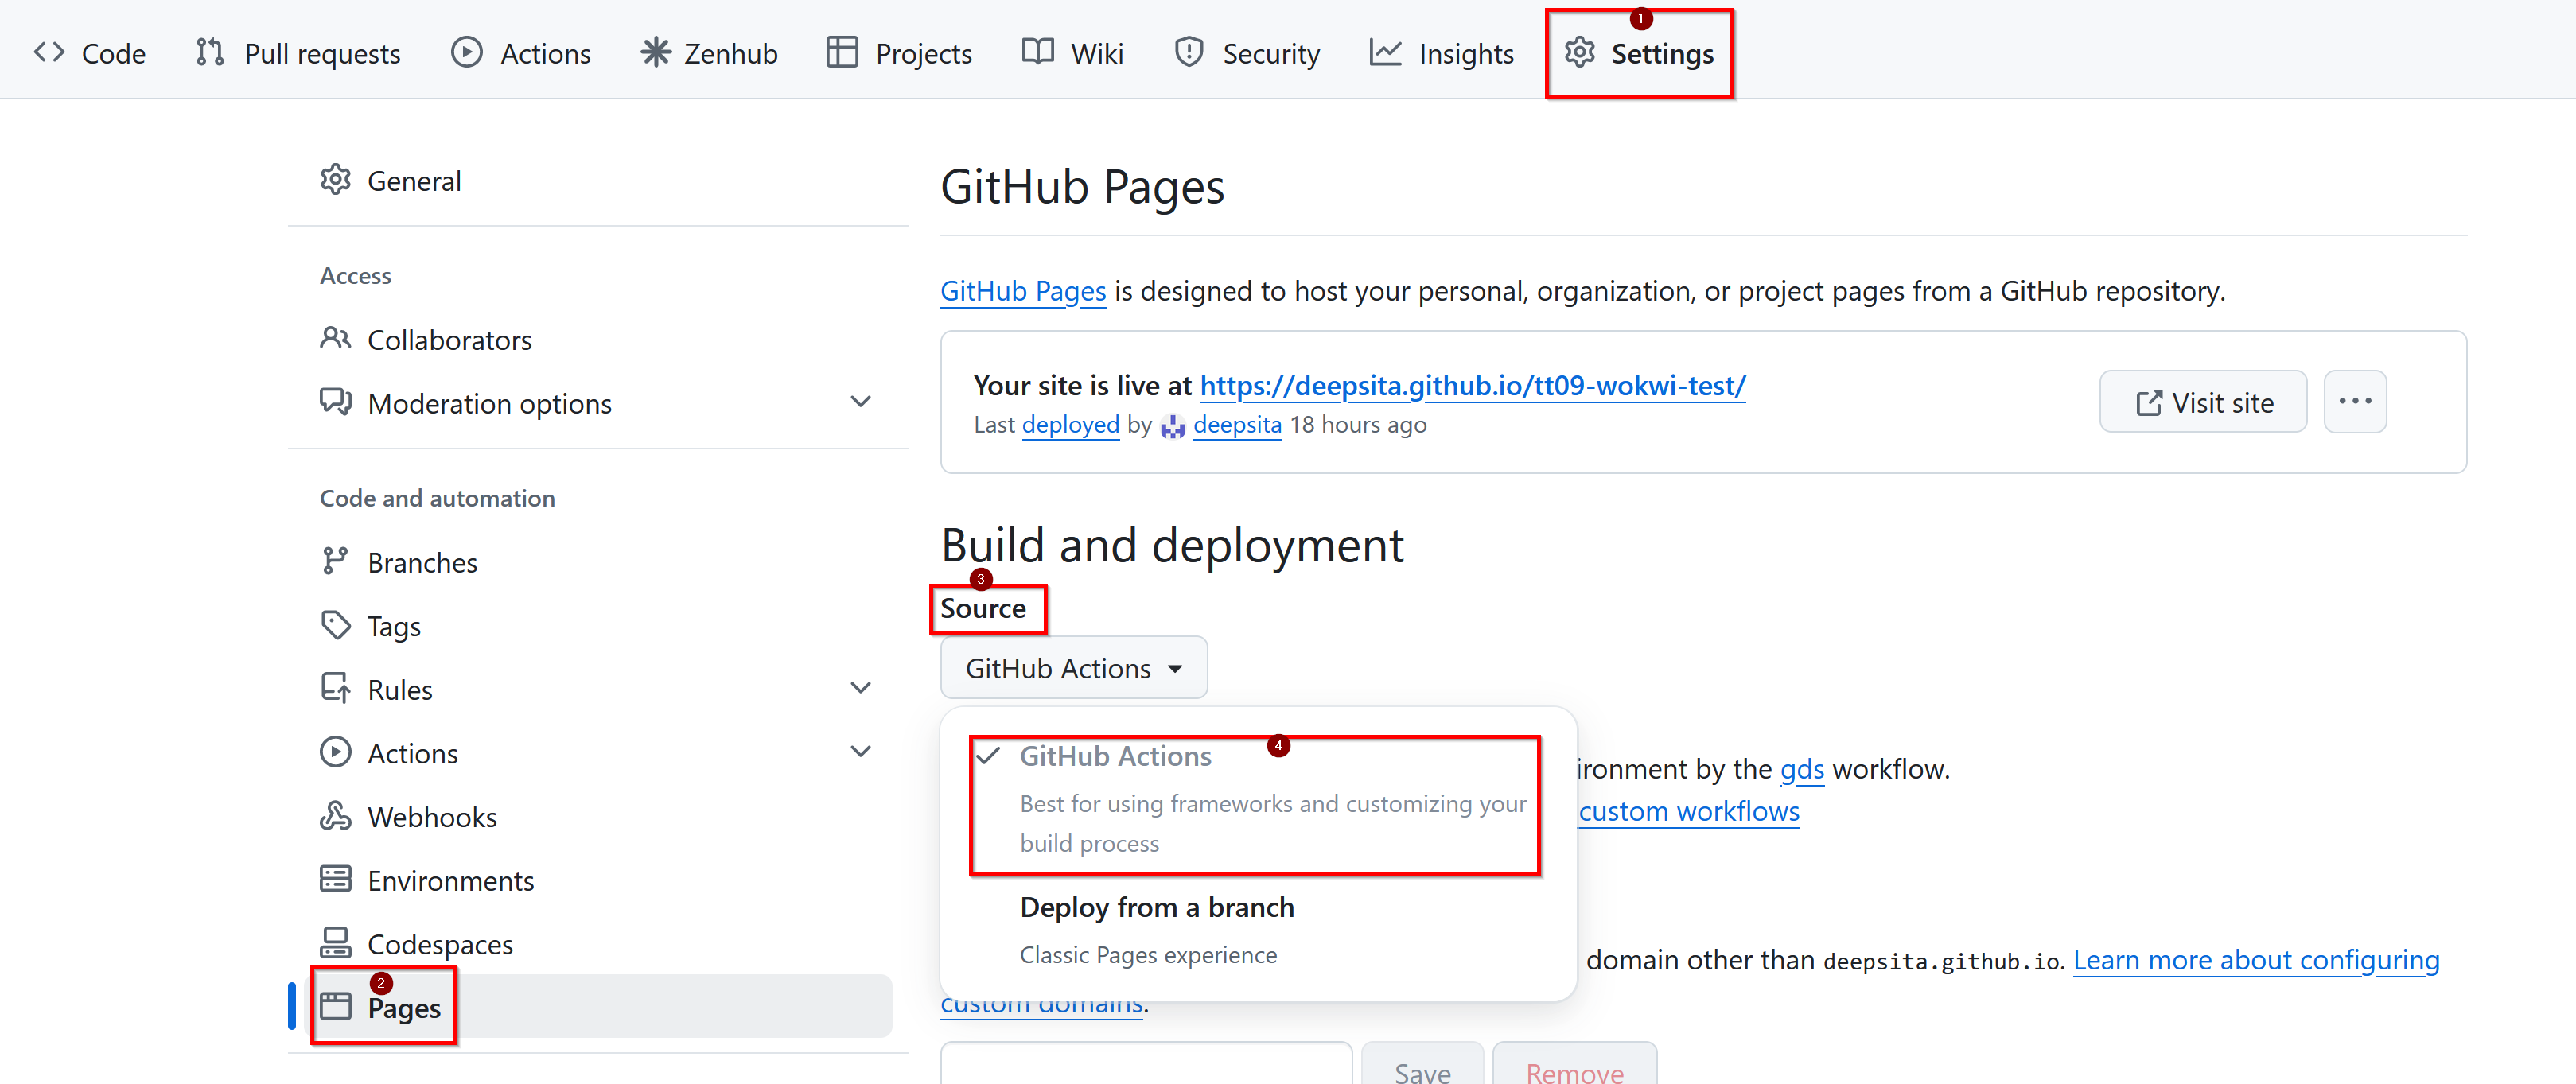
Allow GitHub Actions to publish
GitHub Actions allow automated tasks to run. They are enabled by default, but we need to enable them to publish the results.
- Go to Repository Settings.
- Go to the “Pages” section and set the build and deploy source to GitHub Actions.
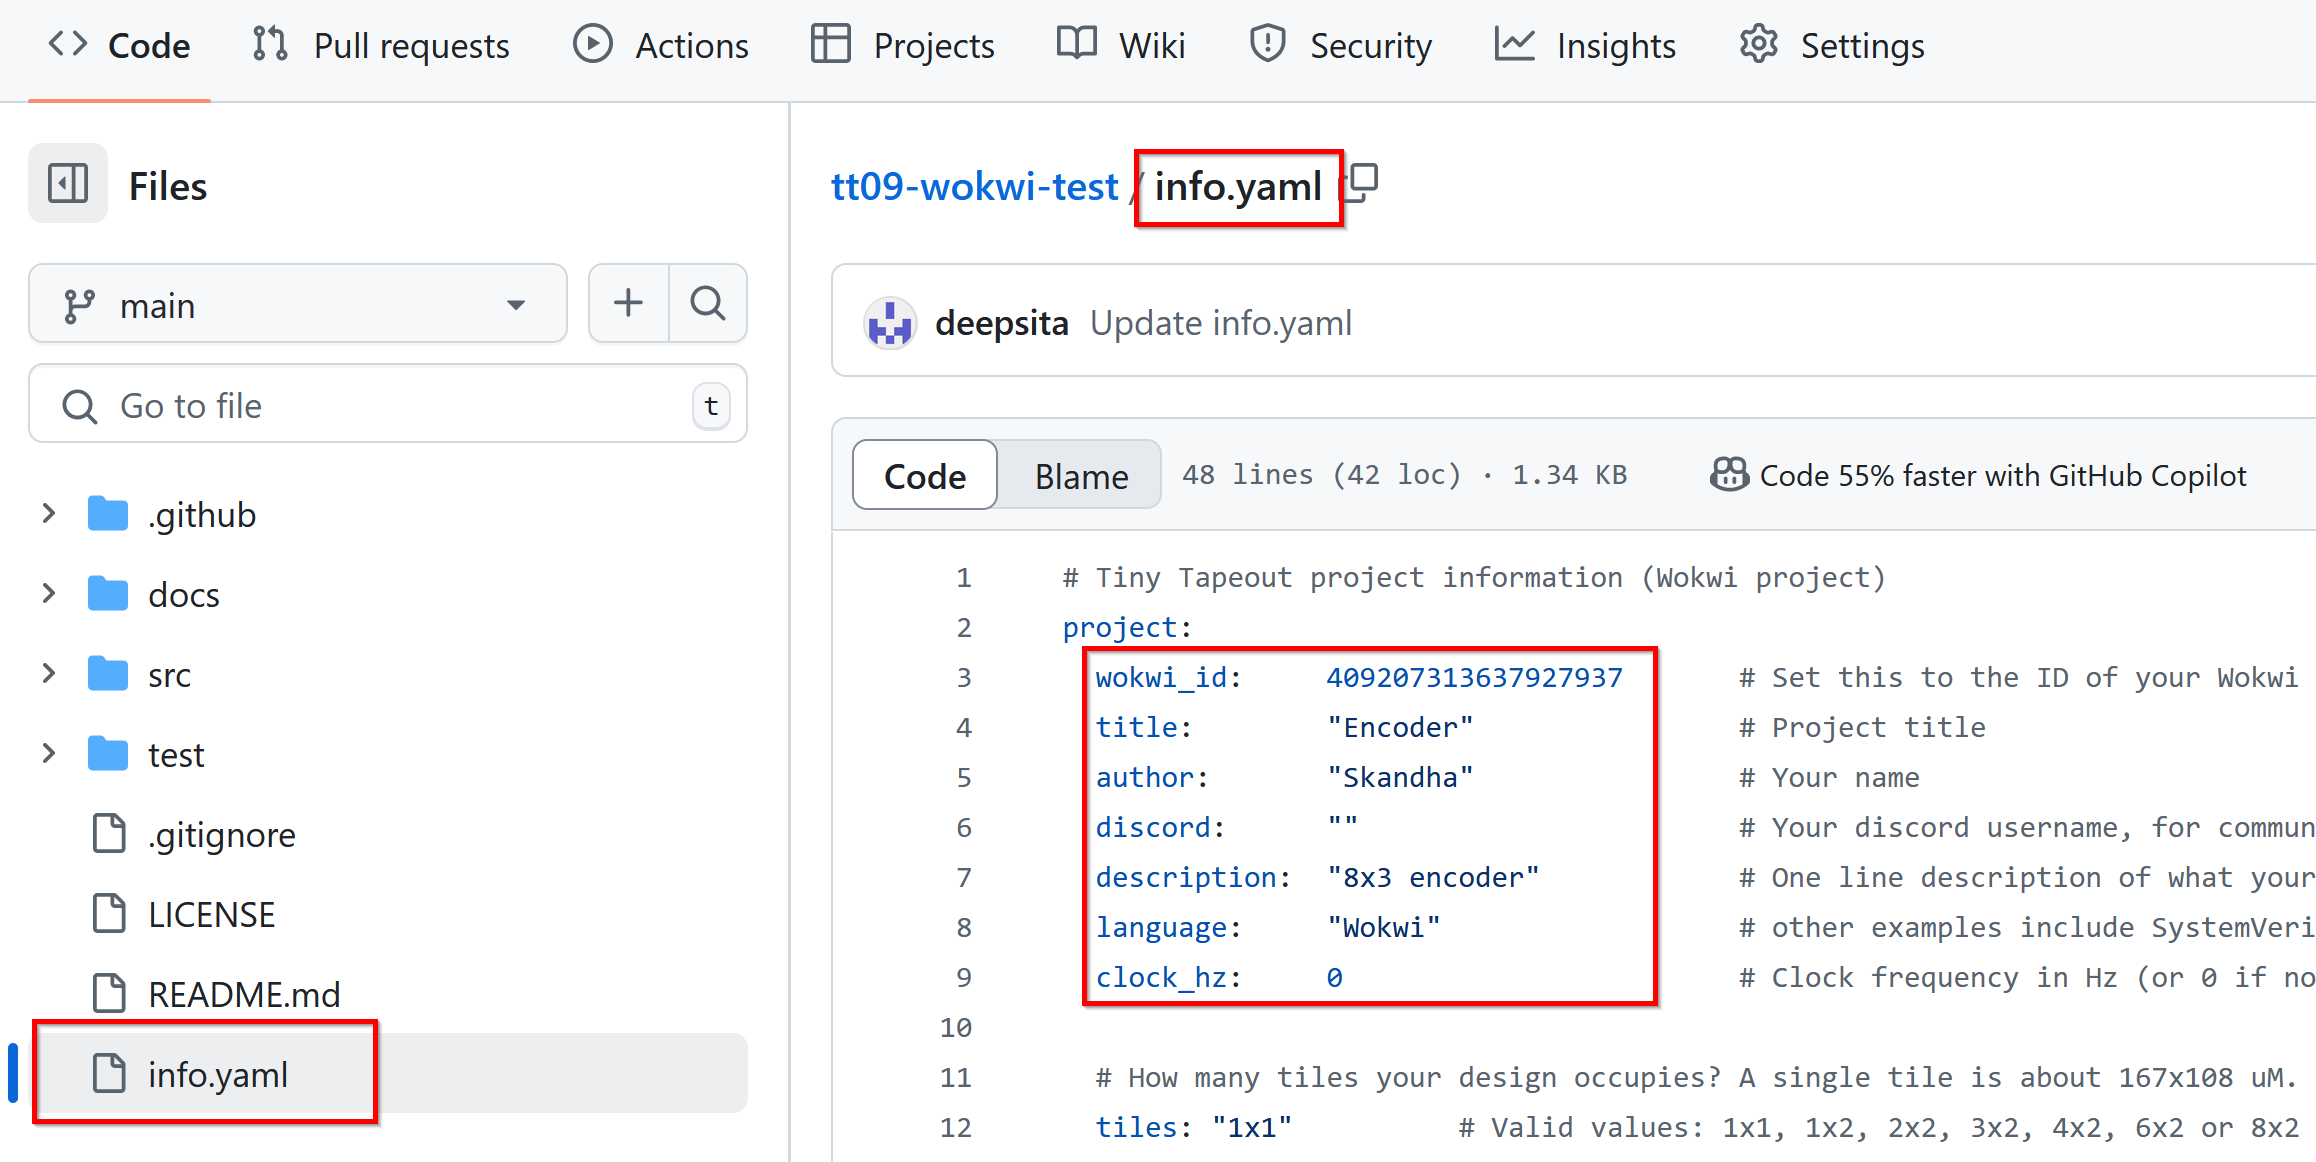
Edit the info.yaml File
The info.yaml is used to tell us the important details of your project, which Wokwi project it is, who its by, what it does, how to test.
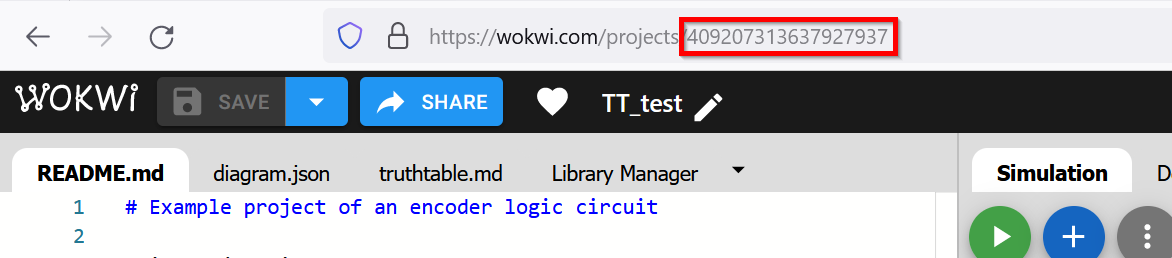
- Update the Wokwi ID in the
info.yamlfile of yur repository to match the ID from your Wokwi project.
- Fill Metadata:
- Enter the ’title’, ‘author’, and your ‘discord’ username
- Include a brief project description in the ‘description’ field.
- If your project needs a specific clock frequency, provide the frequency in Hz under the ‘clock_hz’ field.
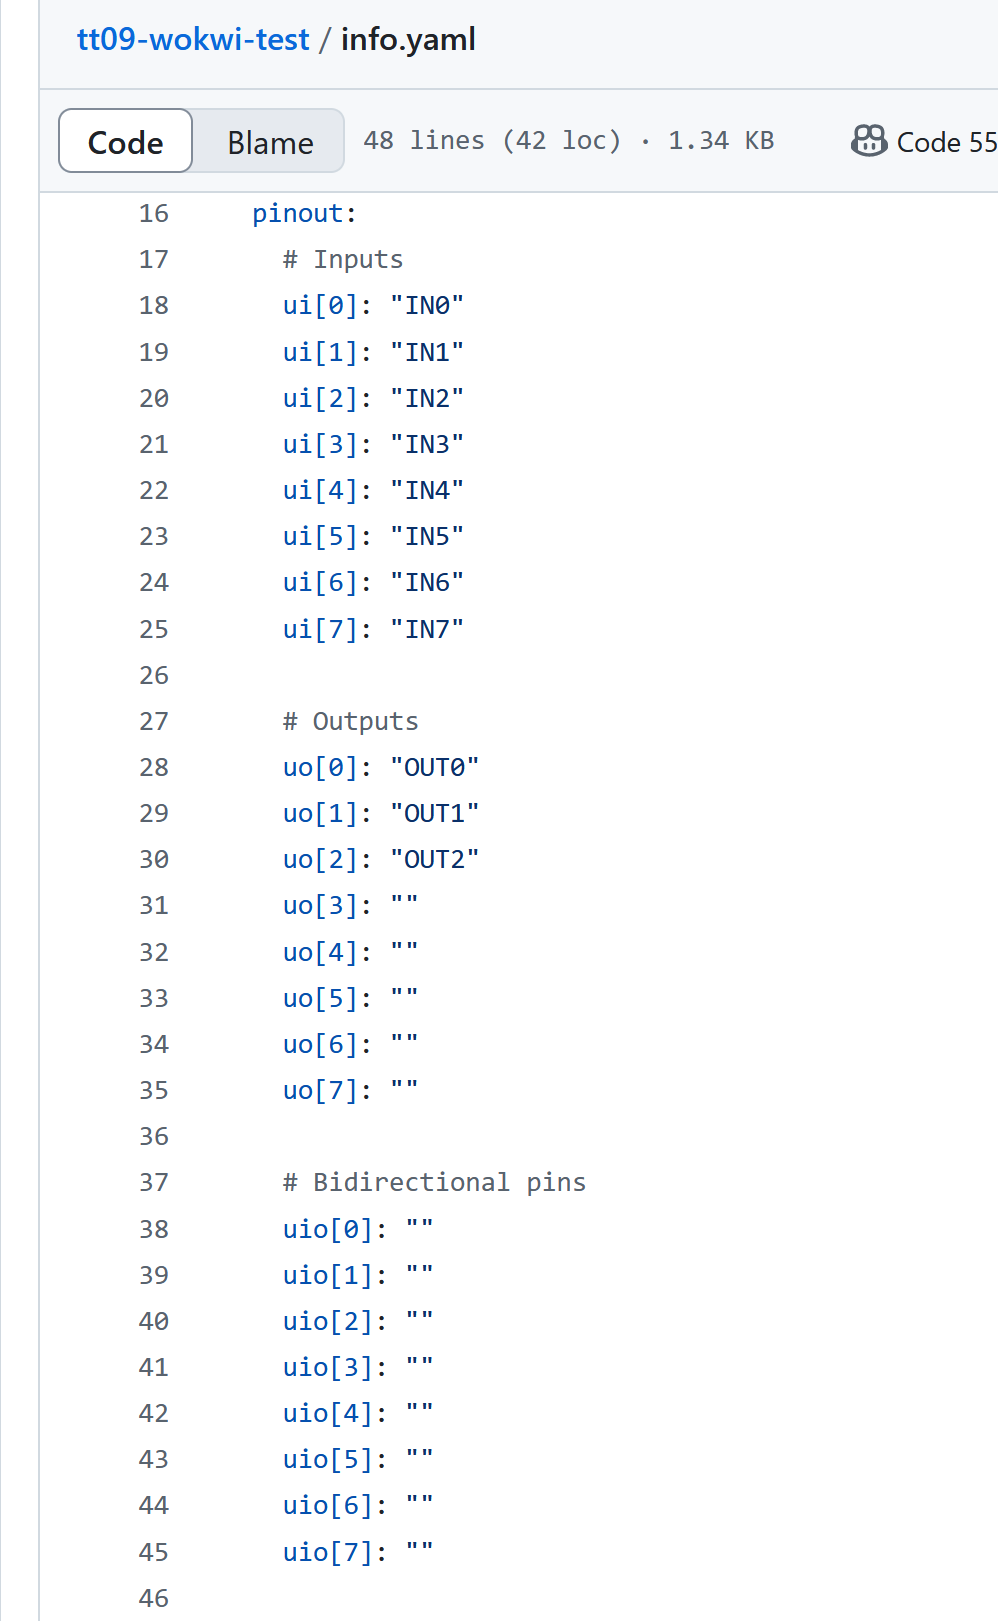
- Describe the pins:
- Provide descriptions for the pins to aid in testing the designs.
- Unused pins are to be left blank and additional pins cannot be included.
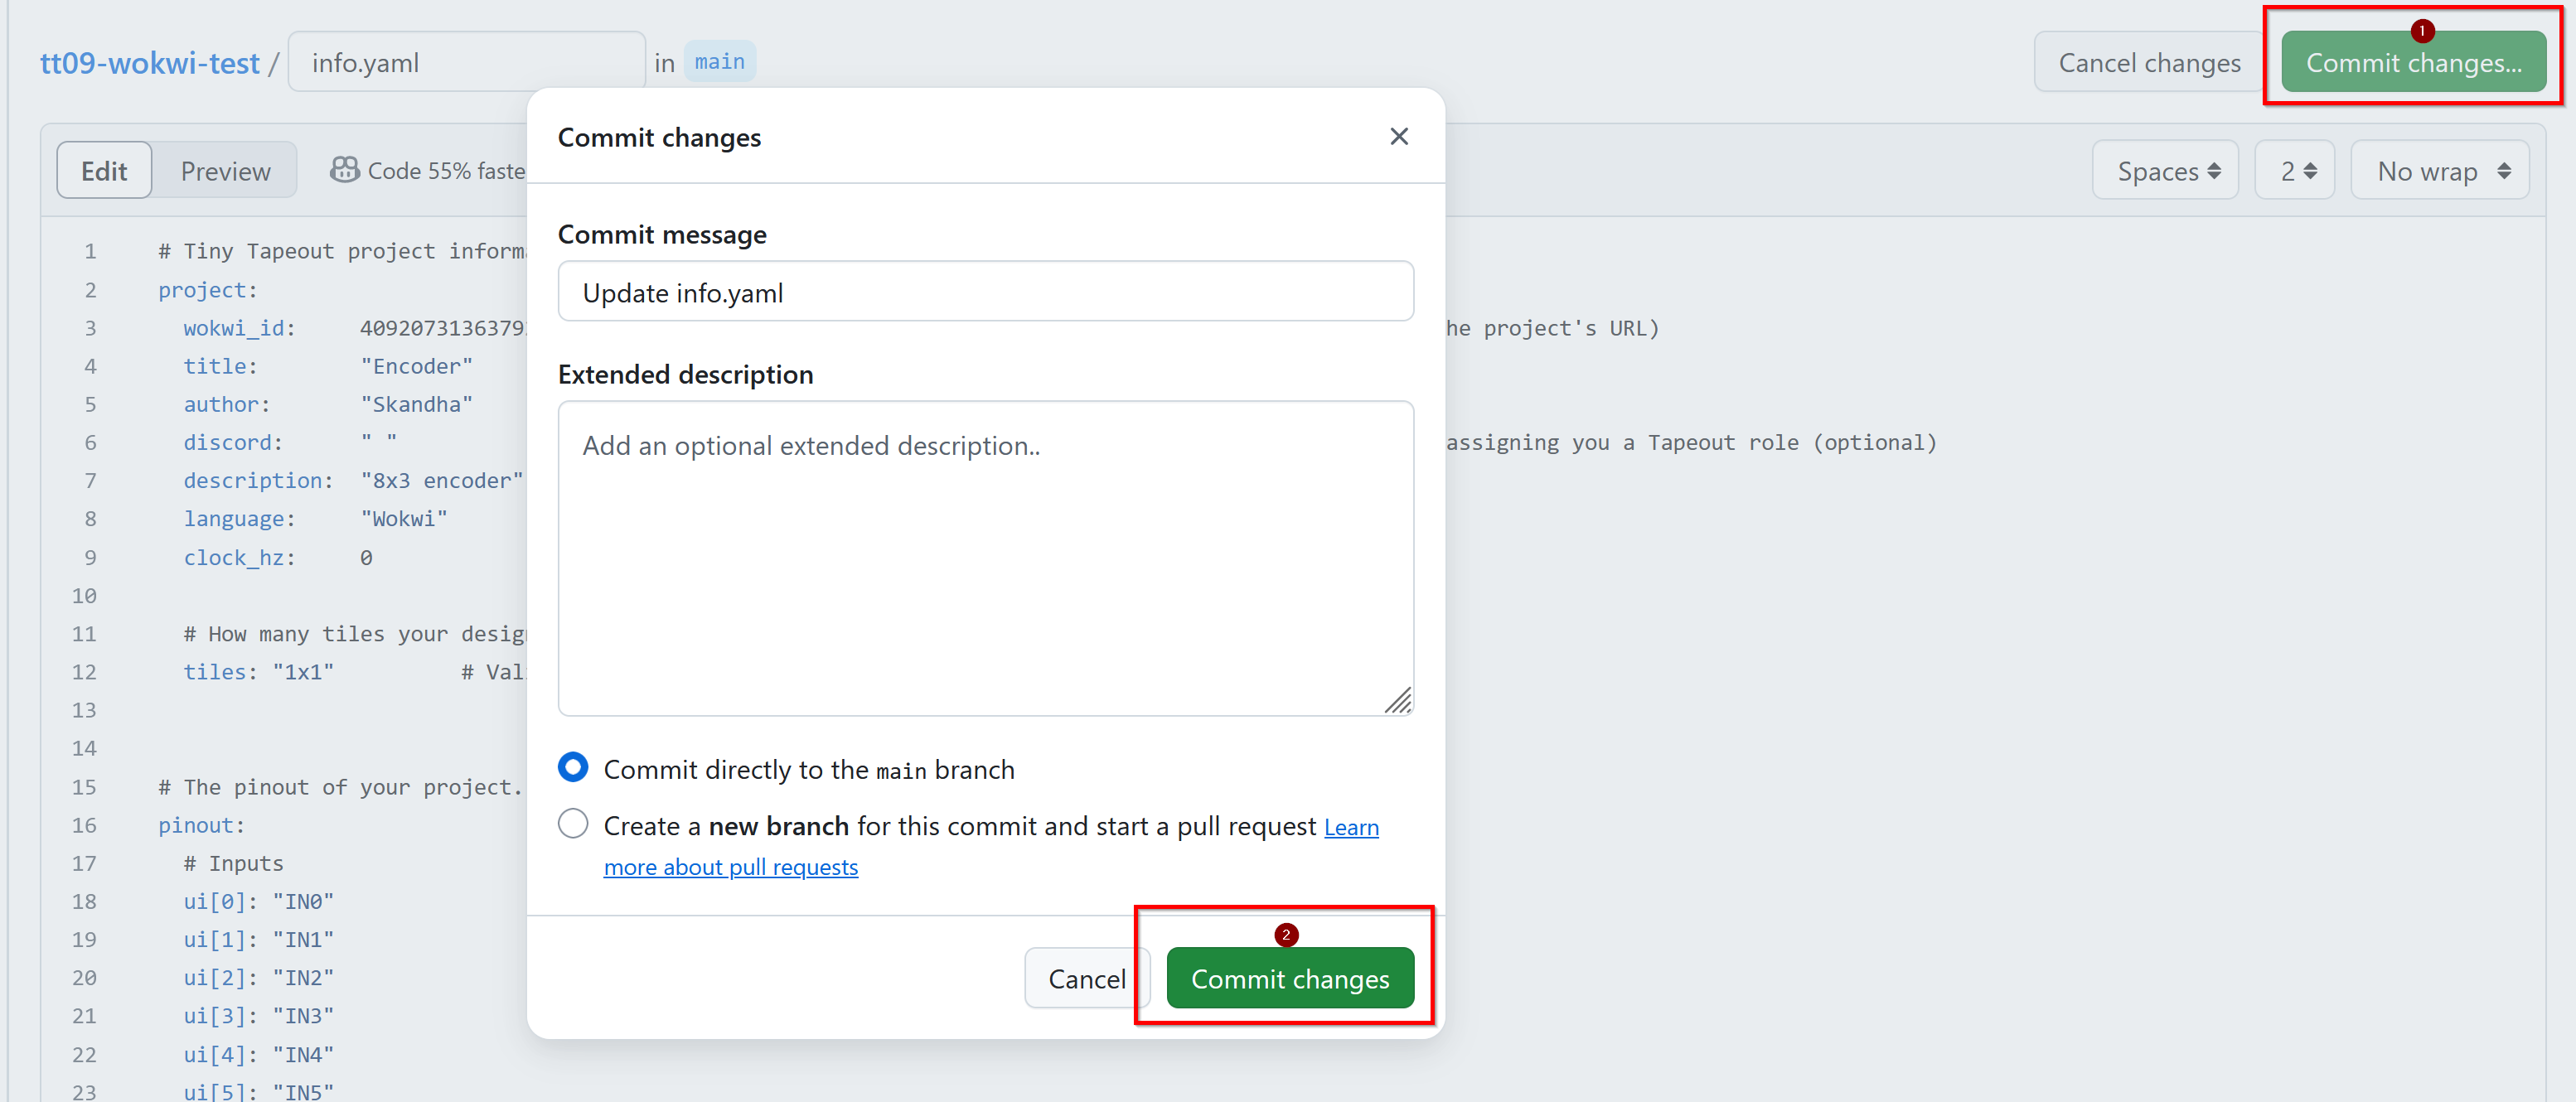
Save your changes
Clicking the commit button will save your changes.
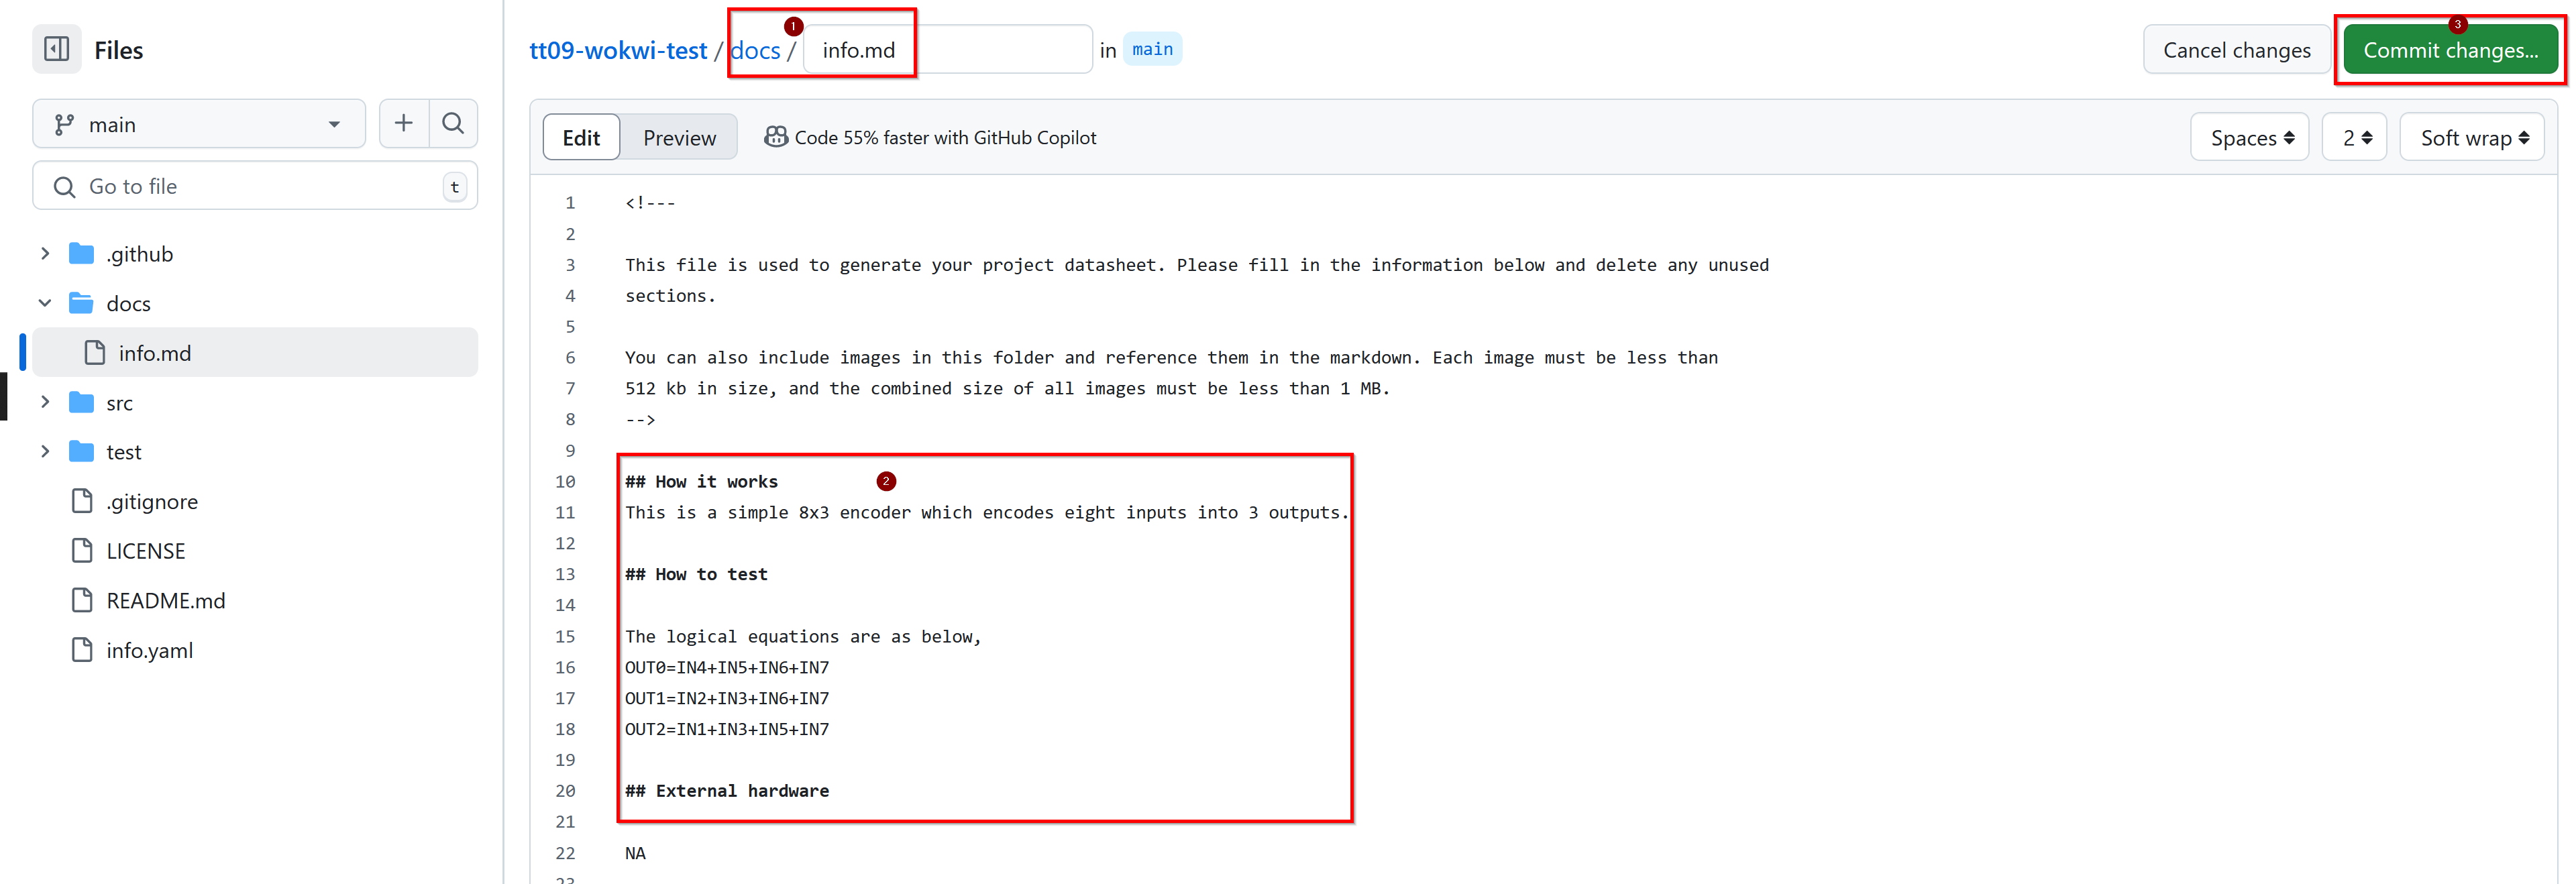
Write some documentation
We put all the project information into a datasheet. You can use Markdown to write your documentation, telling everyone what your chip does and how to test it.
- Edit the
info.mdFile in the docs directory. - Save and commit your changes as you did before.
Leaving the info.md unmodified will cause the ‘docs’ action to fail.
GitHub Actions
GitHub actions are a service provided free of charge for open source projects. They usually start a virtual machine, install and then run some software. Each commit will trigger these actions to run. We use a few different actions to do different tasks:
- docs: This action checks your docs and then generates a PDF preview.
- gds: This action generates the GDS for your project, and shows the results.
- wokwi test: This action will test the design if you created a truth table for your Wokwi design.
To see the currently running and historical actions, go to the ‘Actions’ tab in your repository.

Red indicates failure and green indicates success. Only the ‘docs’ and ‘gds’ actions need to be green.
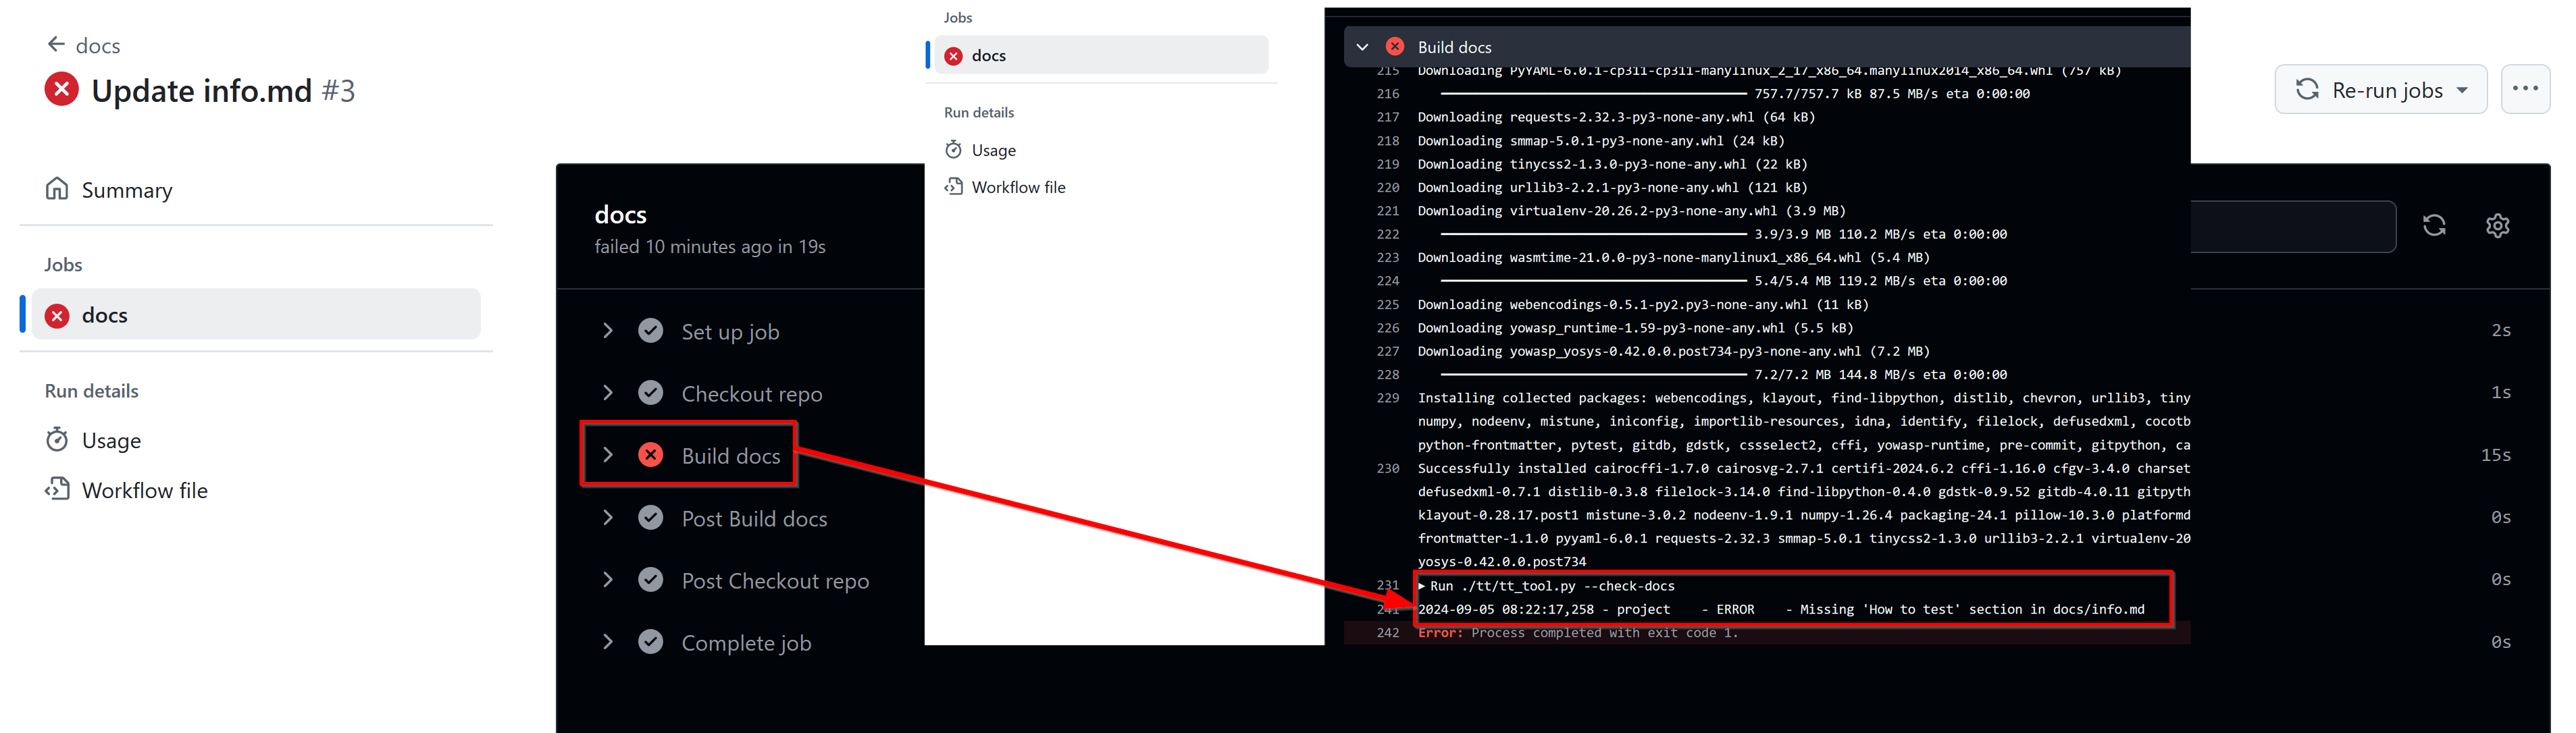
Docs Action
This action generates a preview of how your documentation will look. You can download a PDF preview to check it.
If you have a failure, you can check the log to see what the problem is. The most common error is missing fields in info.yaml or leaving info.md unchanged.
GDS Action
This action generates the GDS for your project, along with warnings, utilization statistics, and cell usage details.
Cell usage
Take a look at the standard cell usage summary. These cells are part of the PDK from Skywater Technologies. The details for each of the standard cells can be viewed by clicking the links.
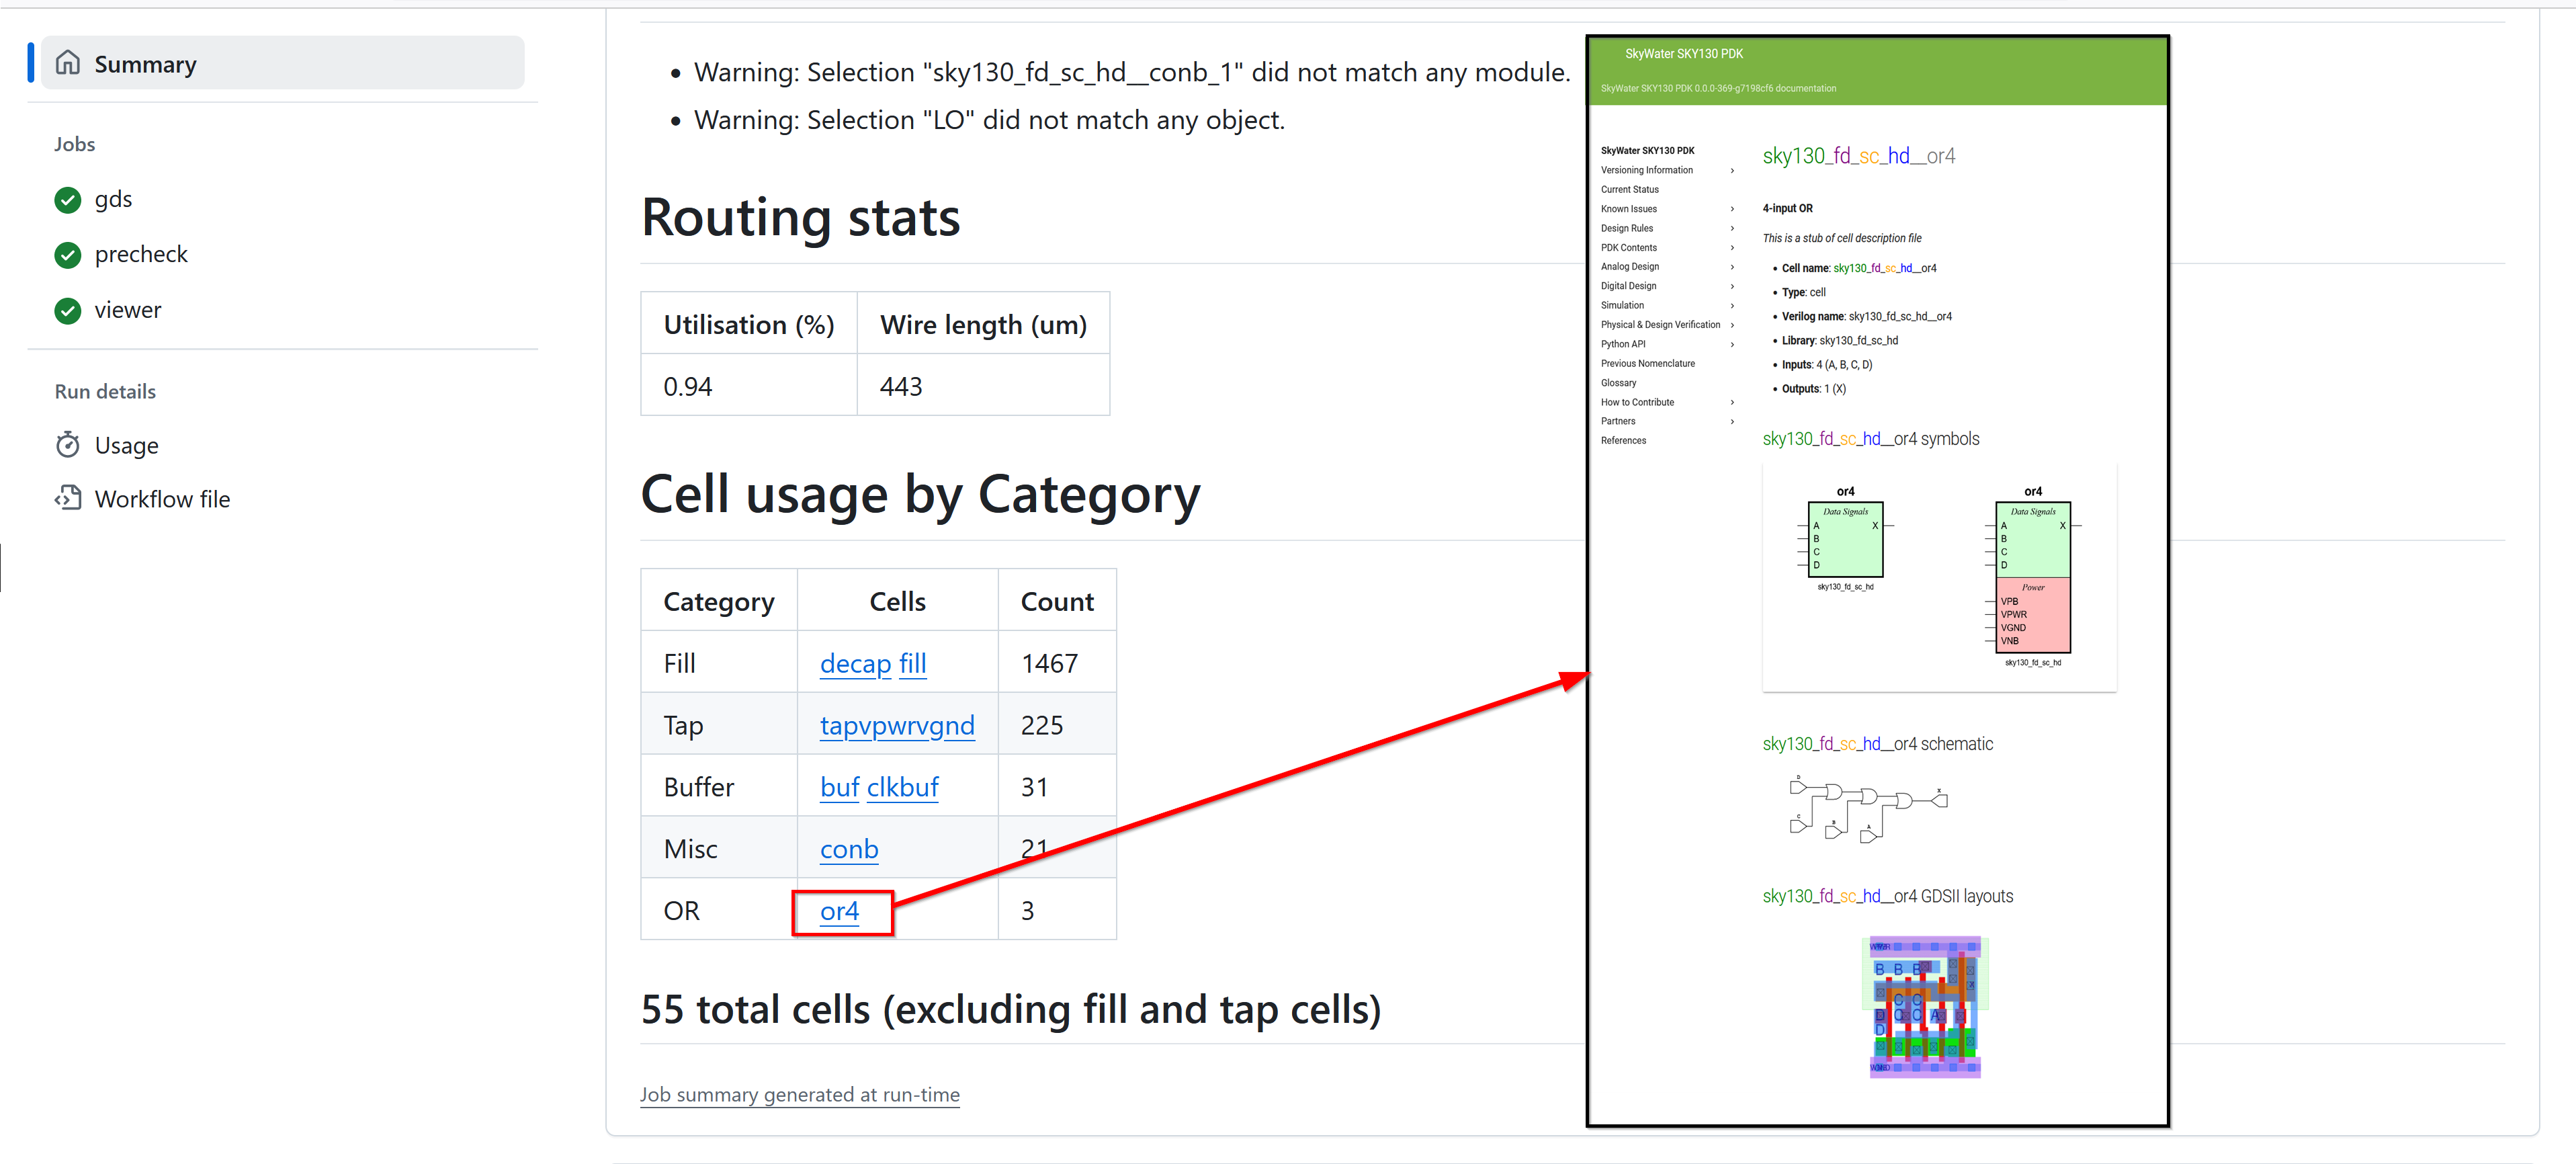
The cell usage table includes additional cells such as fill cells and tap cells that are not part of your original design. Certain cells like fill cells and tap cells are automatically inserted during the physical design stage to ensure the integrity of the layout and meet the manufacturing requirements.
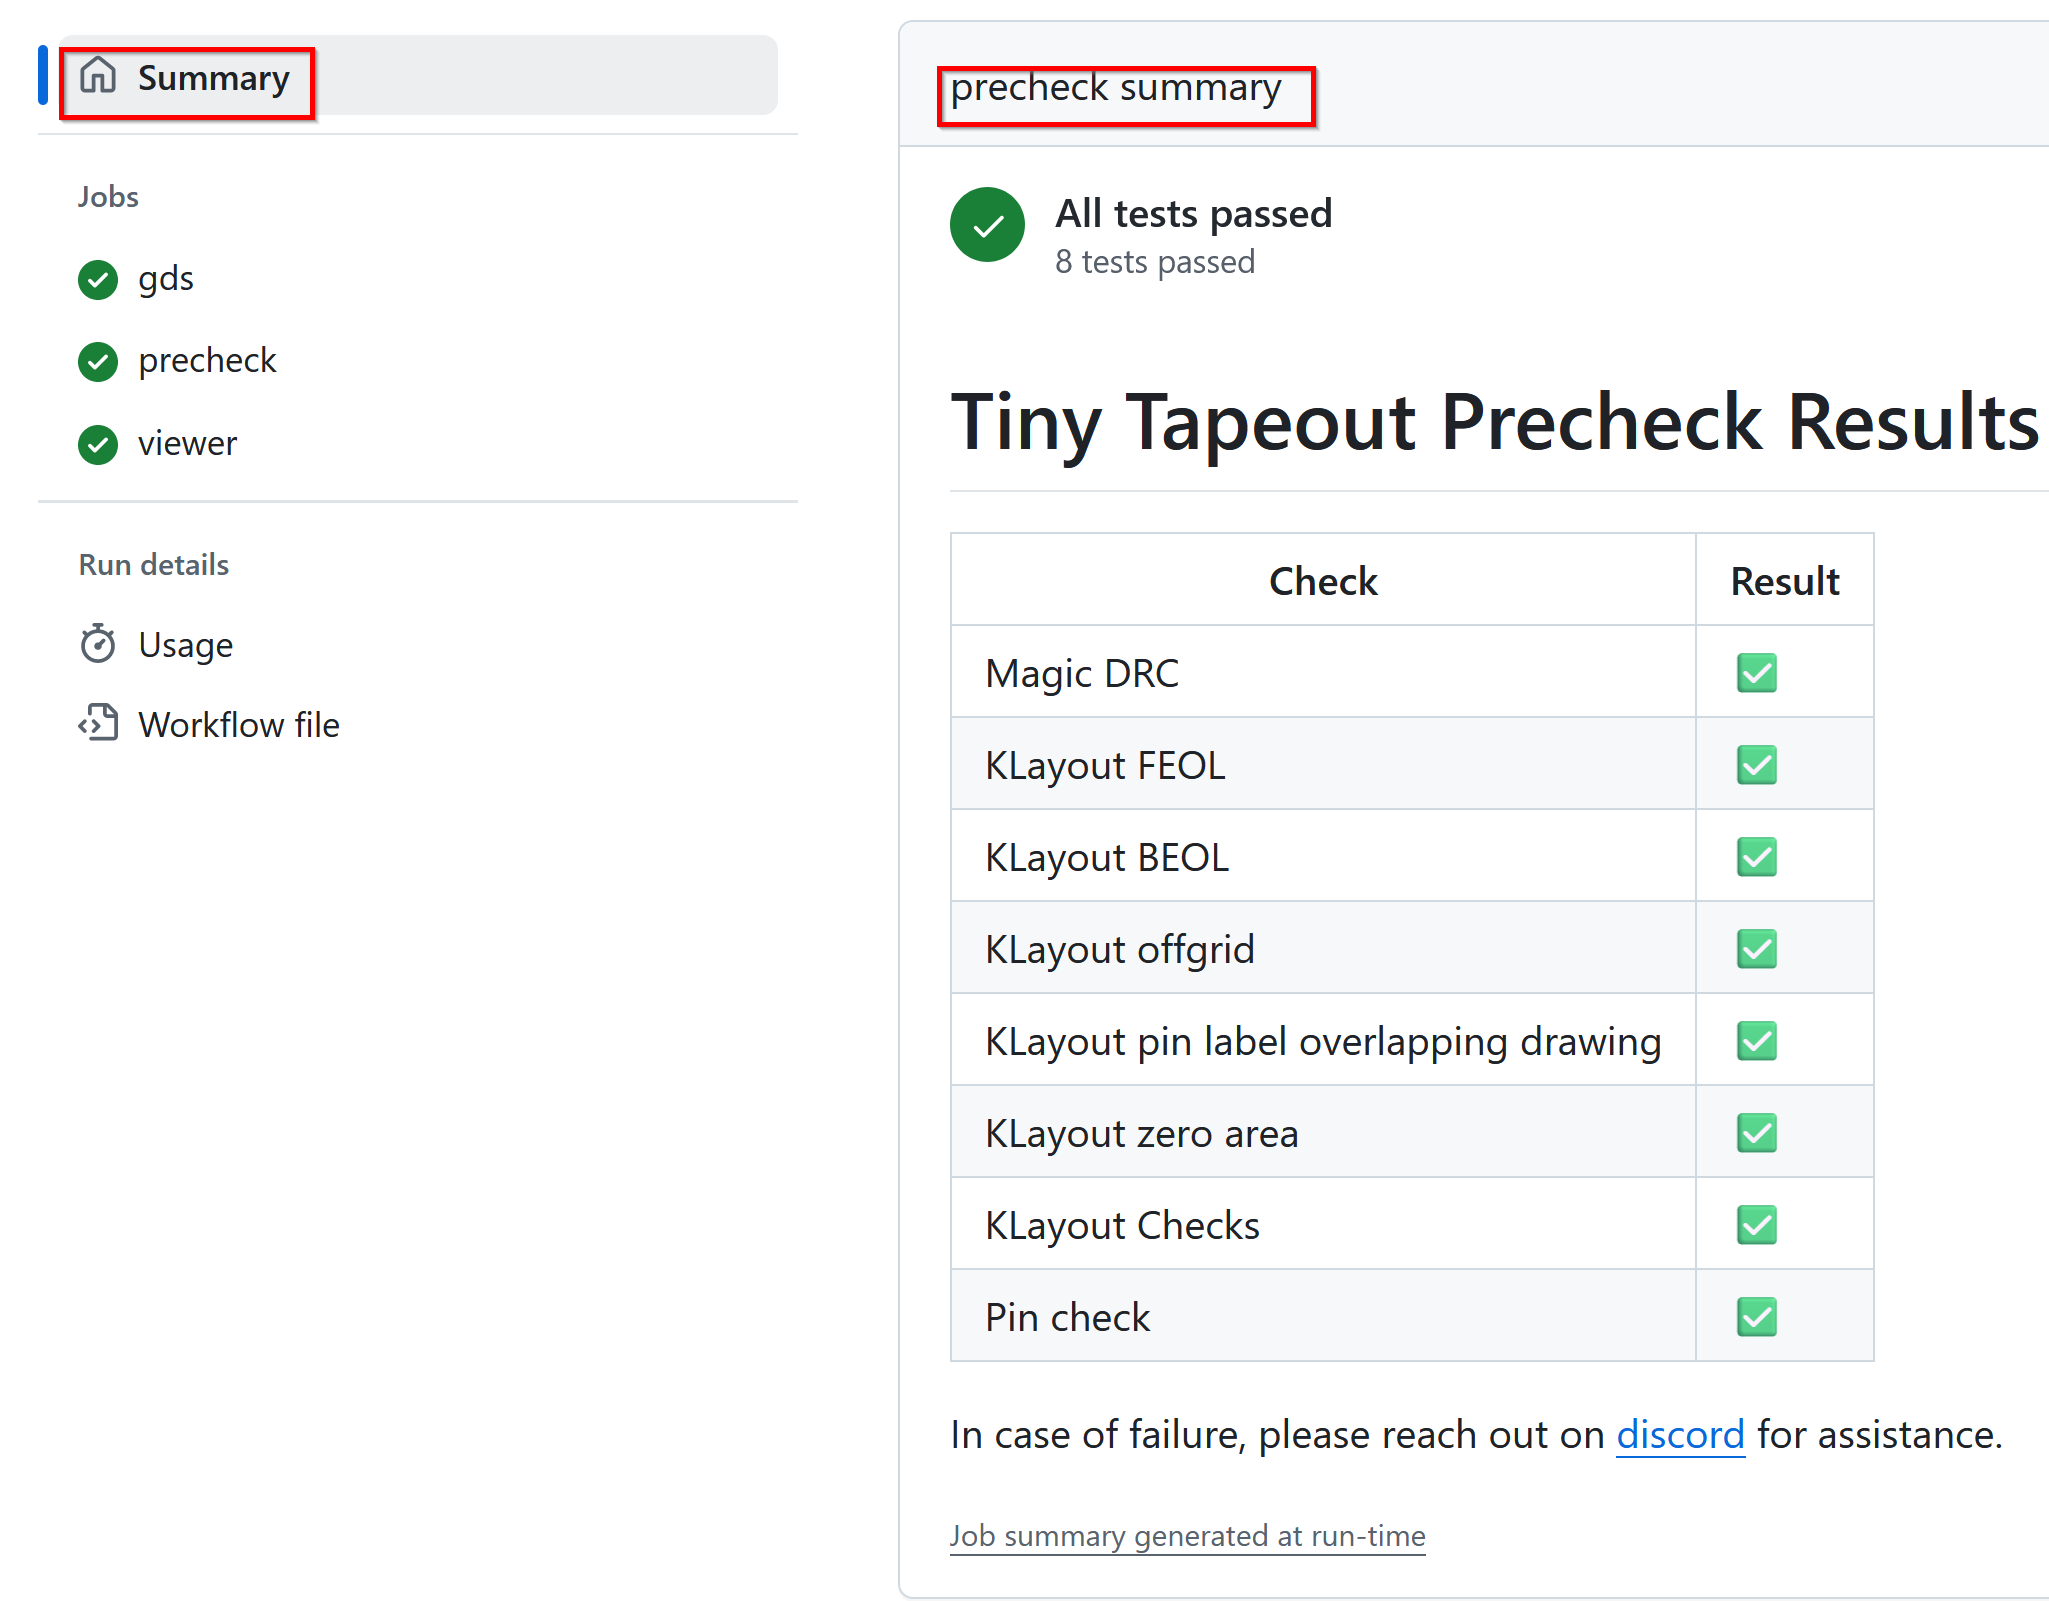
Precheck
The precheck summary shows the results of all the tests we run on the design. All the checks need to be green to submit to the chip.
Viewer
This section gives you the 3D viewer link and the 2D render of your design. Open the 3D viewer by clicking the link.
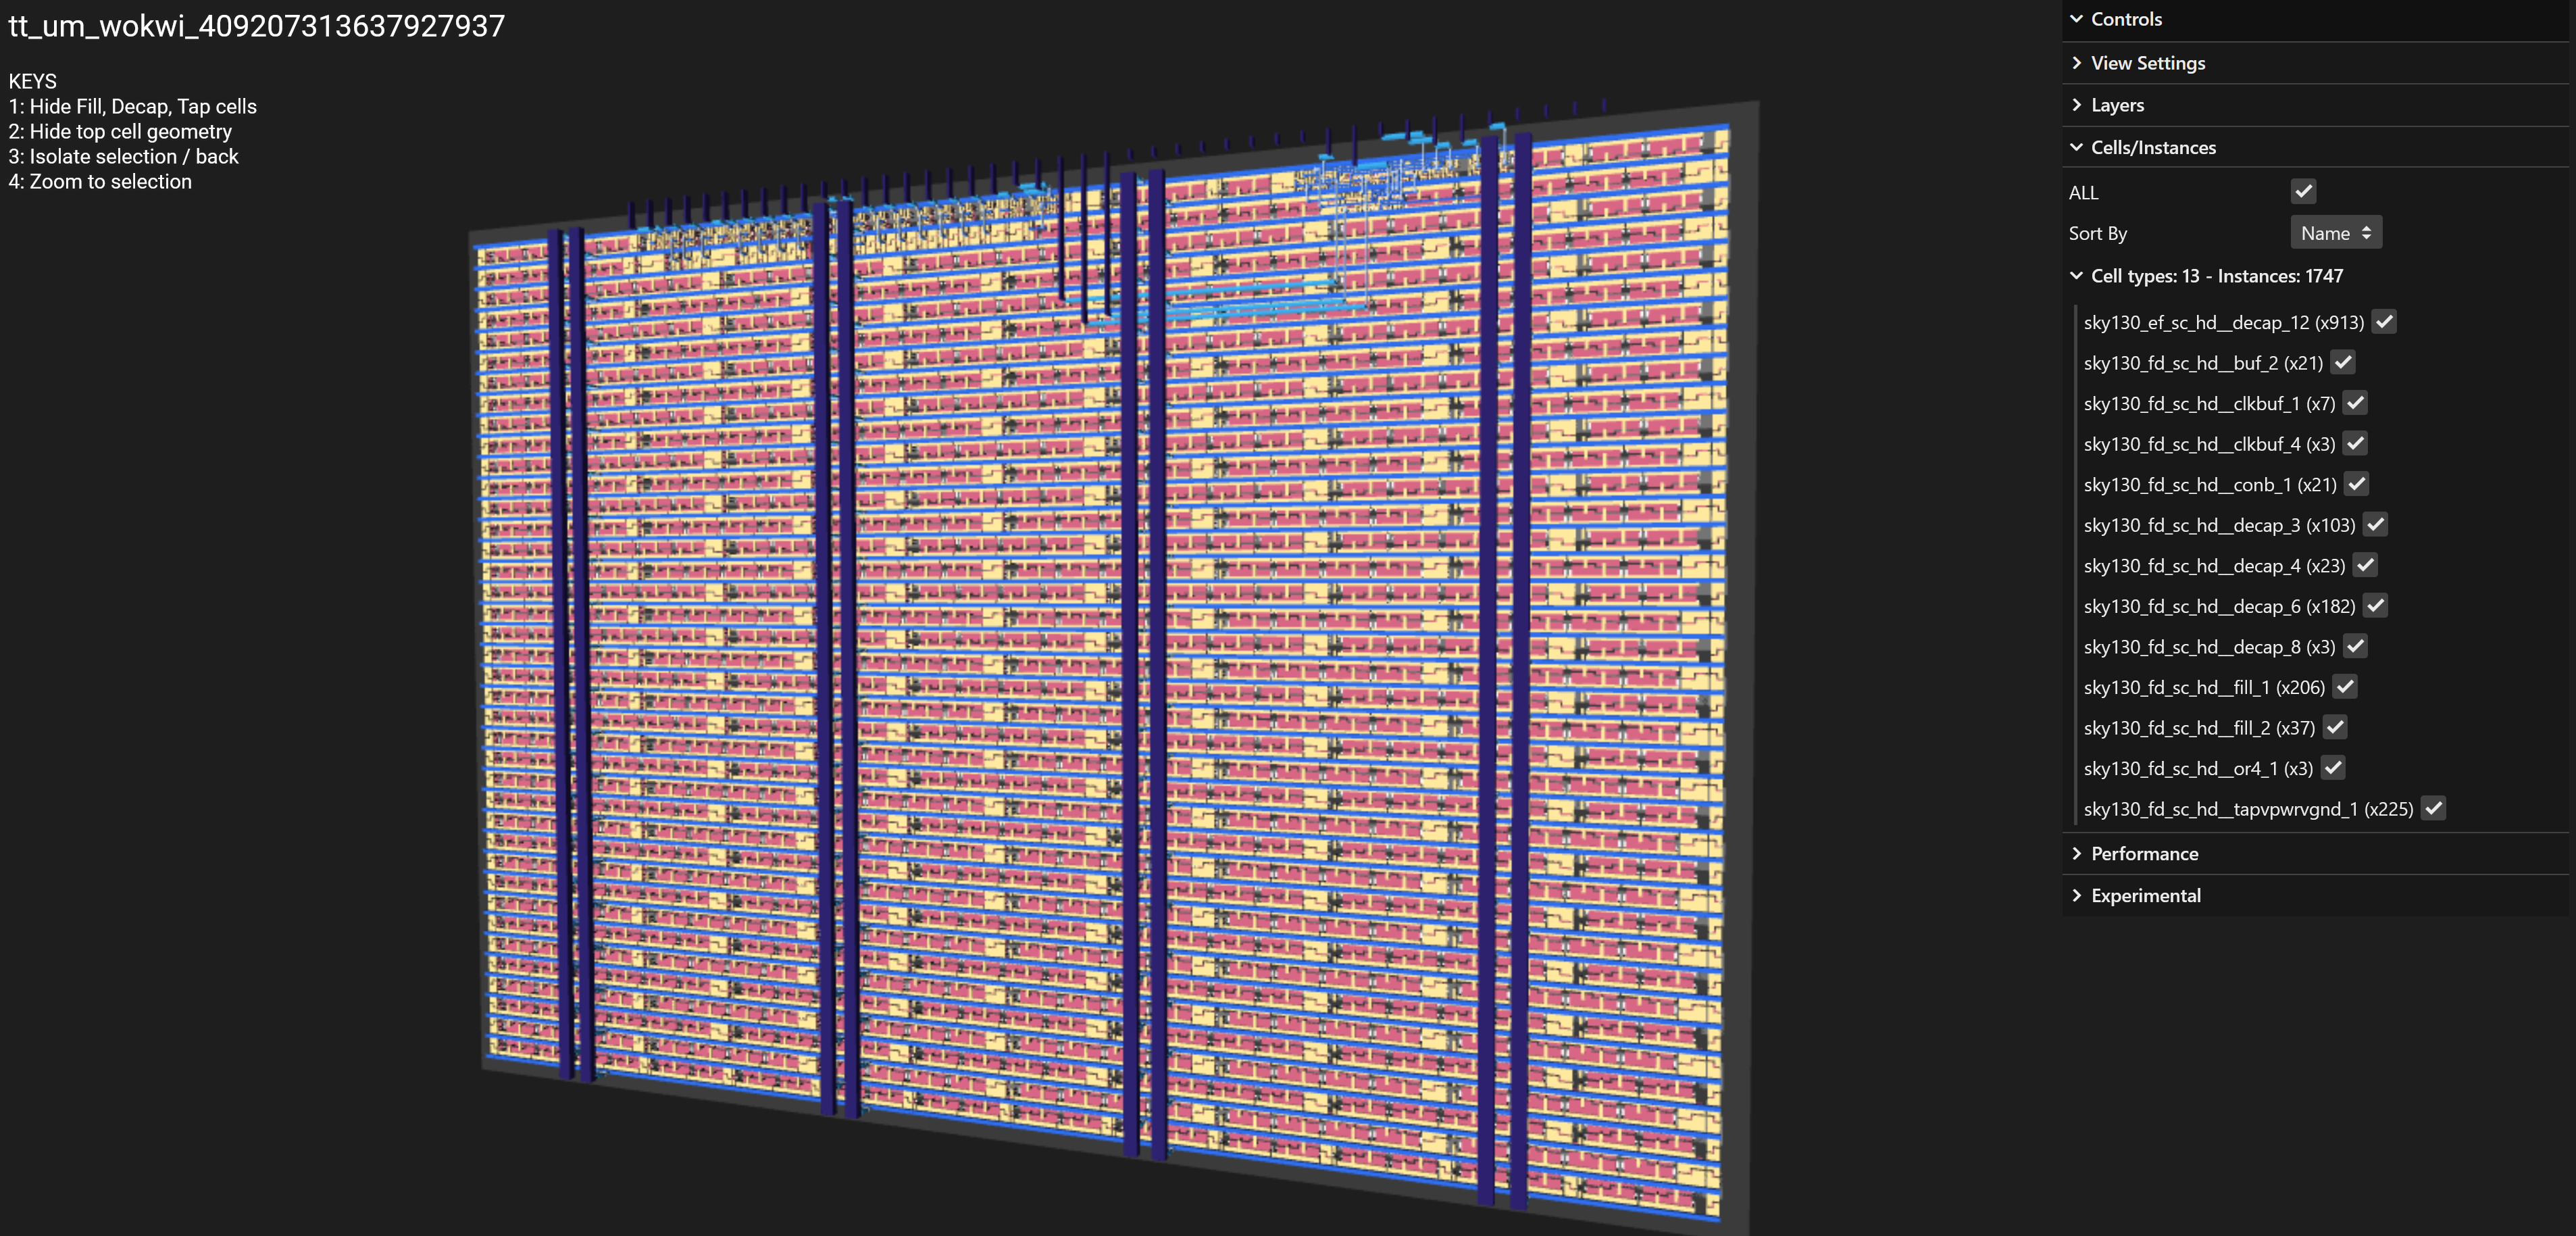
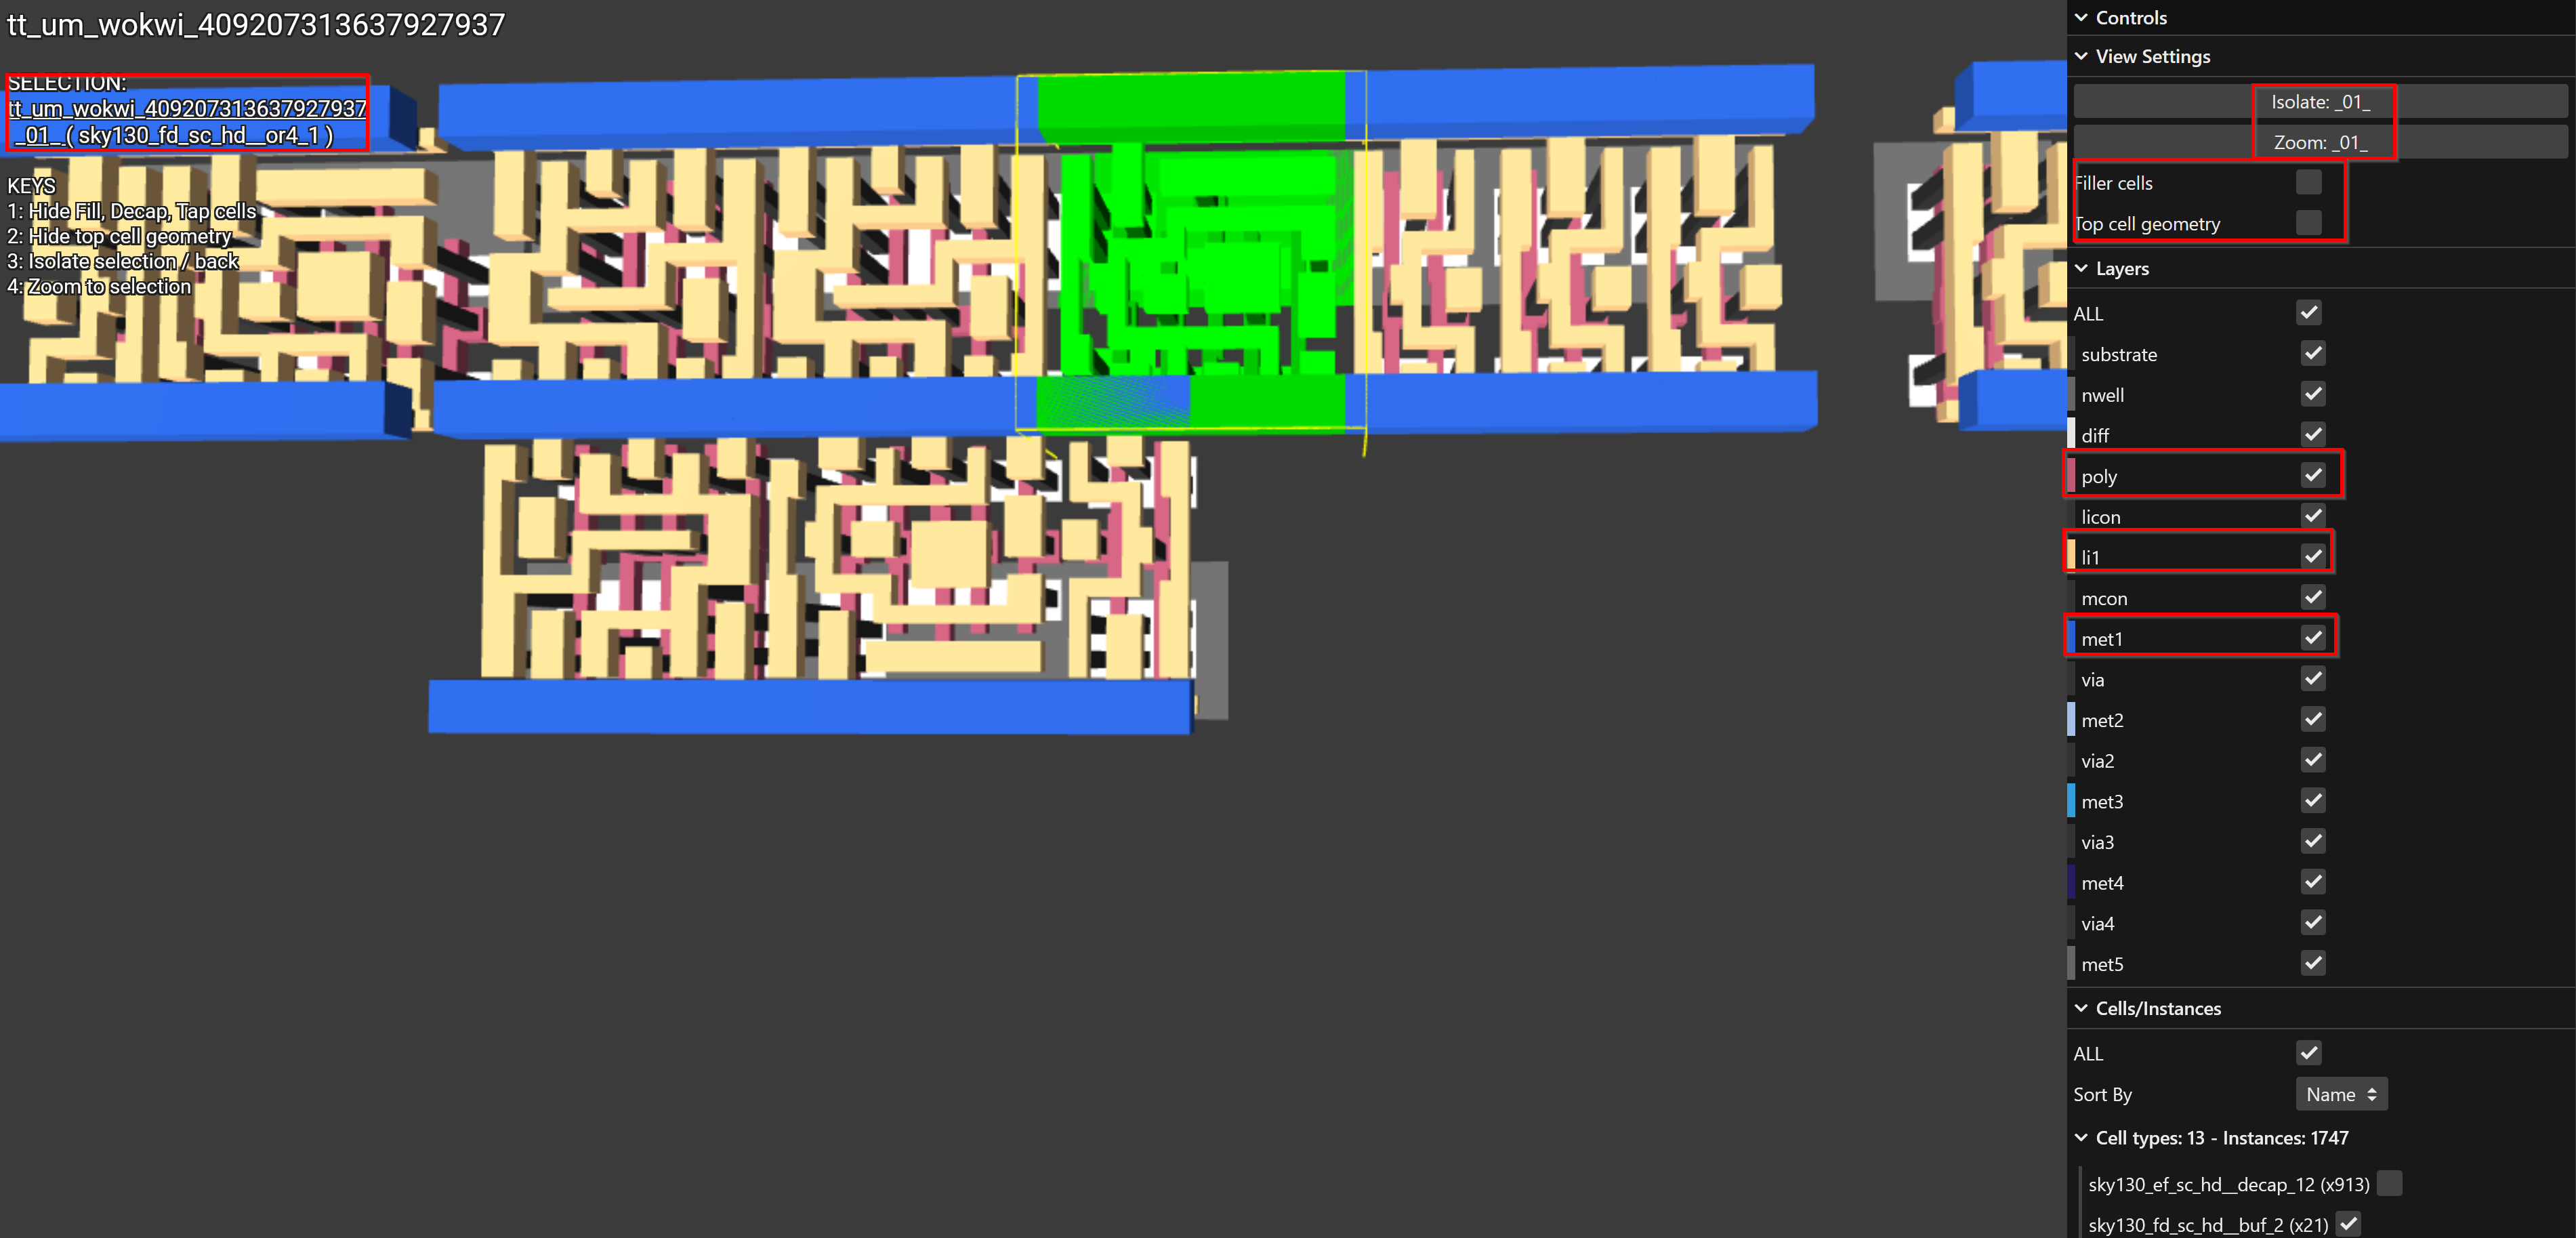
Key commmands
- Hide Fill, Decap, Tap cells.
- Hide top cell geometry.
- Isolate selection / back.
- Zoom to selection.
Mouse commands
- Use the mouse wheel or zoom gesture to zoom.
- Pan and tilt by clicking and dragging.
- Shift with shift left click and drag.
- The layer visibility can be toggled using the checkboxes on the right of viewer under the ’layers’ section.
Congratulations!
Once you have the GDS and Docs jobs completing successfully, you are ready to submit to the Tiny Tapeout shuttle. That’s covered in the next section.
For now, try the following ideas:
- Add a new cell in your Wokwi design and re-trigger the GitHub action to see the result (see the tips section below for how to do that).
- If you’re familiar with Verilog, you can take a look at the Verilog template and see how more advanced designs can be realised.
- Watch the video about how the GitHub action works behind the scenes.
Tips
On each commit the GitHub actions runs automatically. However if you change your Wokwi design, you might want to force the action to run again without making a commit. To do this you can use the ‘Run workflow’ button.
