3 - Create GDS from VGA Playground
This guide will teach you how to create all the files that you need to get your VGA design manufactured. At the end of this, you’ll have a GitHub repository containing your modified VGA design which is ready for submission.
Prerequisites
- Modified VGA Playground project: see the previous exercise if you haven’t done it already.
- GitHub Account: if you don’t have a GitHub account, sign up for one here.
Prepare your project
Set up the repository
You’ll need to create a repository using our IHP template. It contains all the files and settings necessary to convert your design to the GDS we need for manufacture.
- Visit github.com/TinyTapeout/ttihp-verilog-template.
- Click “Use this template” and then “Create a new repository”.

Using the IHP template repository to create a new one
Allow GitHub Actions to publish
GitHub Actions allow automated tasks to run. They are enabled by default, but we need to allow them to publish the results.
- Go to Repository Settings.
- Go to the “Pages” section and set the build and deploy source to GitHub Actions.

Enable publishing by going to Settings 🠒 Pages 🠒 Source 🠒 Select 'GitHub Actions'
Download your project
Download your VGA Playground project by clicking the download icon next to the presets.

Download your VGA Playground project via the download button
You’ll now have a zip file containing a collection of source files.
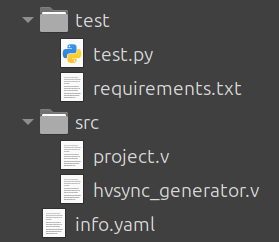
Downloaded project from VGA Playground
Commit your project files into the Git repository
- Commit all of these files to your new repository.
You must retain the folder structure - the files in src must go into the repo’s src folder, and the files in test
go into the repo’s test folder.
You may either commit these files via git from the terminal, or upload them directly to GitHub through the website interface - choose whichever you’re most comfortable with.
Commit using GitHub web interface
Follow this section if you’re not familiar with using git from the terminal.
- Navigate to your repository on GitHub.
- Click the “+” button next to the “<> Code” button, and select “Upload files”.
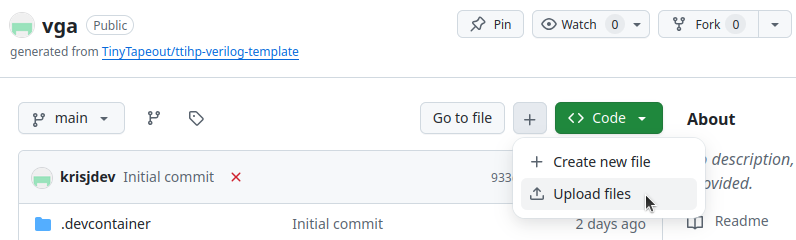
Upload files via the GitHub web interface
- Drag and dropping should keep the same folder structure.
- Drag and drop the
info.yaml,srcandtestdirectories from the zip archive. - Click the green “Commit changes” button.
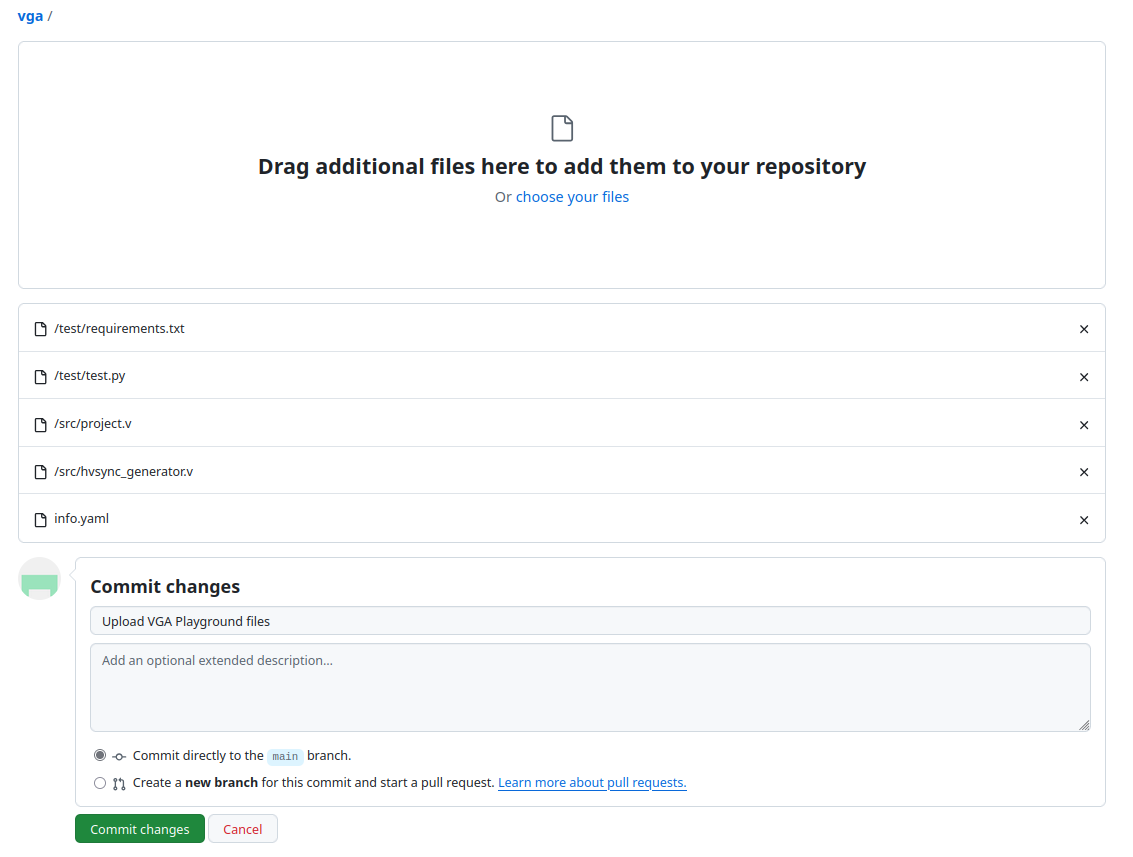
Committing uploaded files to the repository
Edit your project
Update your module name
We’ll need to make changes to a couple files to ensure that the submission process goes smoothly. We need to make sure
that our module name is unique - it is currently set to tt_um_vga_example in the source files. It is recommended that
it follows the following format: tt_um_USERNAME_PROJECTNAME, where USERNAME is your username, and PROJECTNAME is
what you decided to call the project.
- Update the module name in
src/project.vto the module name you chose. - Update the module name in
test/tb.vto the same module name. - Commit your changes to the repo.
Update info.yaml
info.yaml is used to tell us the important details of your project: who it’s by, what it does, its source files and
its pinout. Make sure you fill out these sections carefully.
- Edit the corresponding variables to update your project information:
title: Give your project a memorable name.author: Enter the name(s) of the author(s) (use a comma to separate them if there are multiple).discord: Optional, add your discord tag and join our discord to stay informed.description: One line description of your project.top_module: Update this string to the unique module name you made in the previous section.
- Commit your changes to the repo.
Do not modify clock_hz, tiles or source_files unless you know what you’re doing!
If your design makes use of additional pins for input or output, you should edit the corresponding pin under pinout.
| Label | Description |
|---|---|
ui |
User input |
uo |
User output |
uio |
User input/output (bidirectional pins) |
You should briefly describe their functionality or role - aim for this to be a label or ~3 words max. You’ll have an opportunity later to describe them in more detail if you need to.
Edit test.py
We will be editing the CocoTB tests in test/test.py in order to force them to pass - make the following changes:
- Insert
cocotb.pass_test()after theasync def test_project(dut):line. - Insert
cocotb.pass_test()after theasync def compare_reference(dut):line. - Commit your changes to the repo.
It should look something like the following (note that lines were cut for brevity):
@cocotb.test()
async def test_project(dut):
    cocotb.pass_test() # <- add this line!

    # Set clock period to 40 ns (25 MHz)
    CLOCK_PERIOD = 40

    [...]


@cocotb.test()
async def compare_reference(dut):
    cocotb.pass_test() # <- add this line too!

    for img in glob.glob("output/frame*.png"):
        [...]
Update the test’s Makefile
Add the hvsync_generator.v file to the list of PROJECT_SOURCES in test/Makefile:
PROJECT_SOURCES = project.v hvsync_generator.v
Write some documentation
Everybody submitting to a shared shuttle ends up getting a copy of your design, so having clear and concise documentation allows everybody to use and explore your design! We also combine all the project documentation together into one big datasheet which is available to view from the shuttle’s online page.
Please write in English and use the Markdown syntax appropriately to describe and explain your design.
- Edit
docs/info.mdto include information about your design.- “How it works” and “How to test” sections must be updated.
- Commit your changes to the repo.
Leaving the “How it works” and “How to test” sections unchanged will cause the GitHub Actions to fail.
Submitting your project
Your project will be ready for submission once the docs and gds actions light up green - you
can see the status of them if you navigate to your README.md online or to the “Actions” tab in the repository.

Actions button in the repository
GitHub Actions are a service provided free-of-charge for open-source projects. We make use of these to automatically run a set of programs every time a commit is made to the repository. We use a selection of different actions to do various tasks:
docs: Compile your project documentation into a PDF - uses content ininfo.yamlanddocs/info.md.gds: Generate the GDS for your project and shows you some interesting information.test: Usestest.pyto automatically test your design with CocoTB.fpga: Create an FPGA bitstream to upload your design onto an FPGA.
You only need to have docs and gds passing (lit up green) in order to submit your design.
Docs Action
This action generates a preview of how your documentation will look. You can download a PDF preview to check it.
If you have a failure, you can check the log to see what caused the issue. The most common error is missing fields in
info.yaml or leaving docs/info.md unchanged.
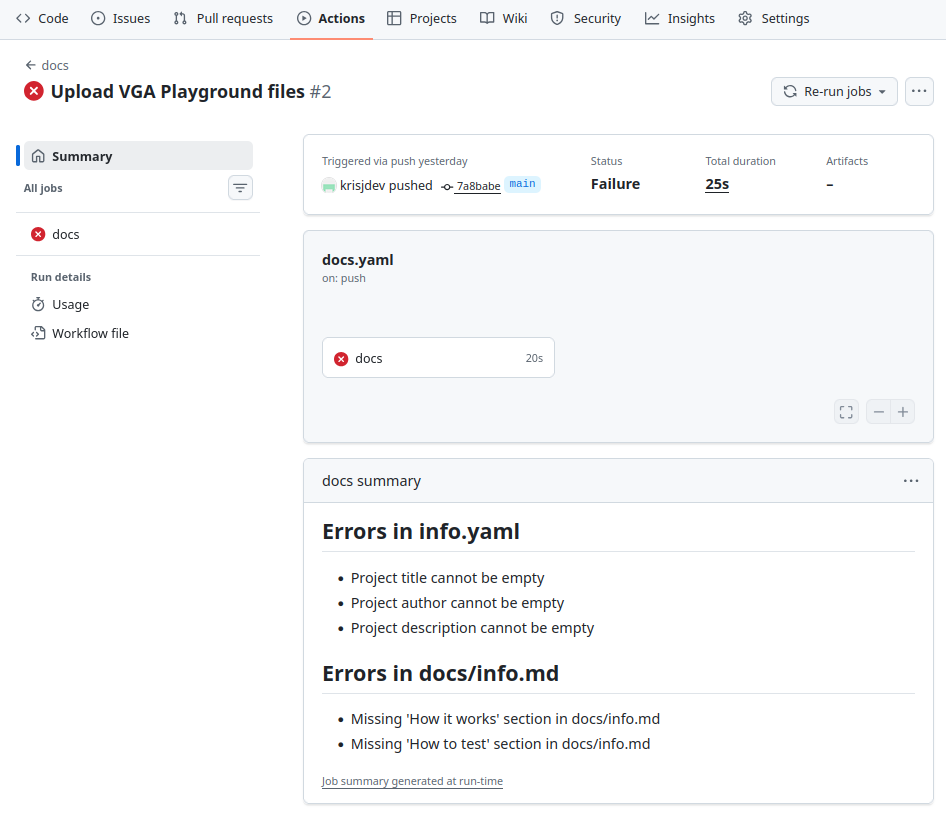
Example of failing docs action
GDS Action
This action generates the GDS for your project, along with warnings, utilisation statistics, and cell usage details. If you have a failure, you can check the log to see what the problem is. The most common errors are:
- Not allowing the GitHub action to publish.
- Using unsynthesizable Verilog.
If you get stuck, ask a TA!
Explore the design!
Within the GDS action, you can view all the gritty details about your design - types of cells being used and how many, total area and wire usage, precheck results and your design rendered in 2D & 3D!
Cell usage
Take a look at the standard cell usage summary. These cells are a part of the PDK provided by IHP. The details of each cell can be viewed by clicking the links.

Viewing NOR2Bx cell documentation from the GDS action
The cell usage table also includes additional cells such as fill cells and tap cells that are not a part of your original design. These types of cells are automatically inserted during the physical design stage to ensure the integrity of the layout and meet manufacturing requirements.
Precheck
The precheck summary shows the results of all the tests we run on the design. All the checks need to be green to submit on the chip.
Viewer
This section gives you the 3D viewer link and the 2D render of your design. Open the 3D viewer by clicking the “Open 3D viewer” link.
Explore the design - you can rotate, zoom and hide certain layers or cells. Can you find the I/O?
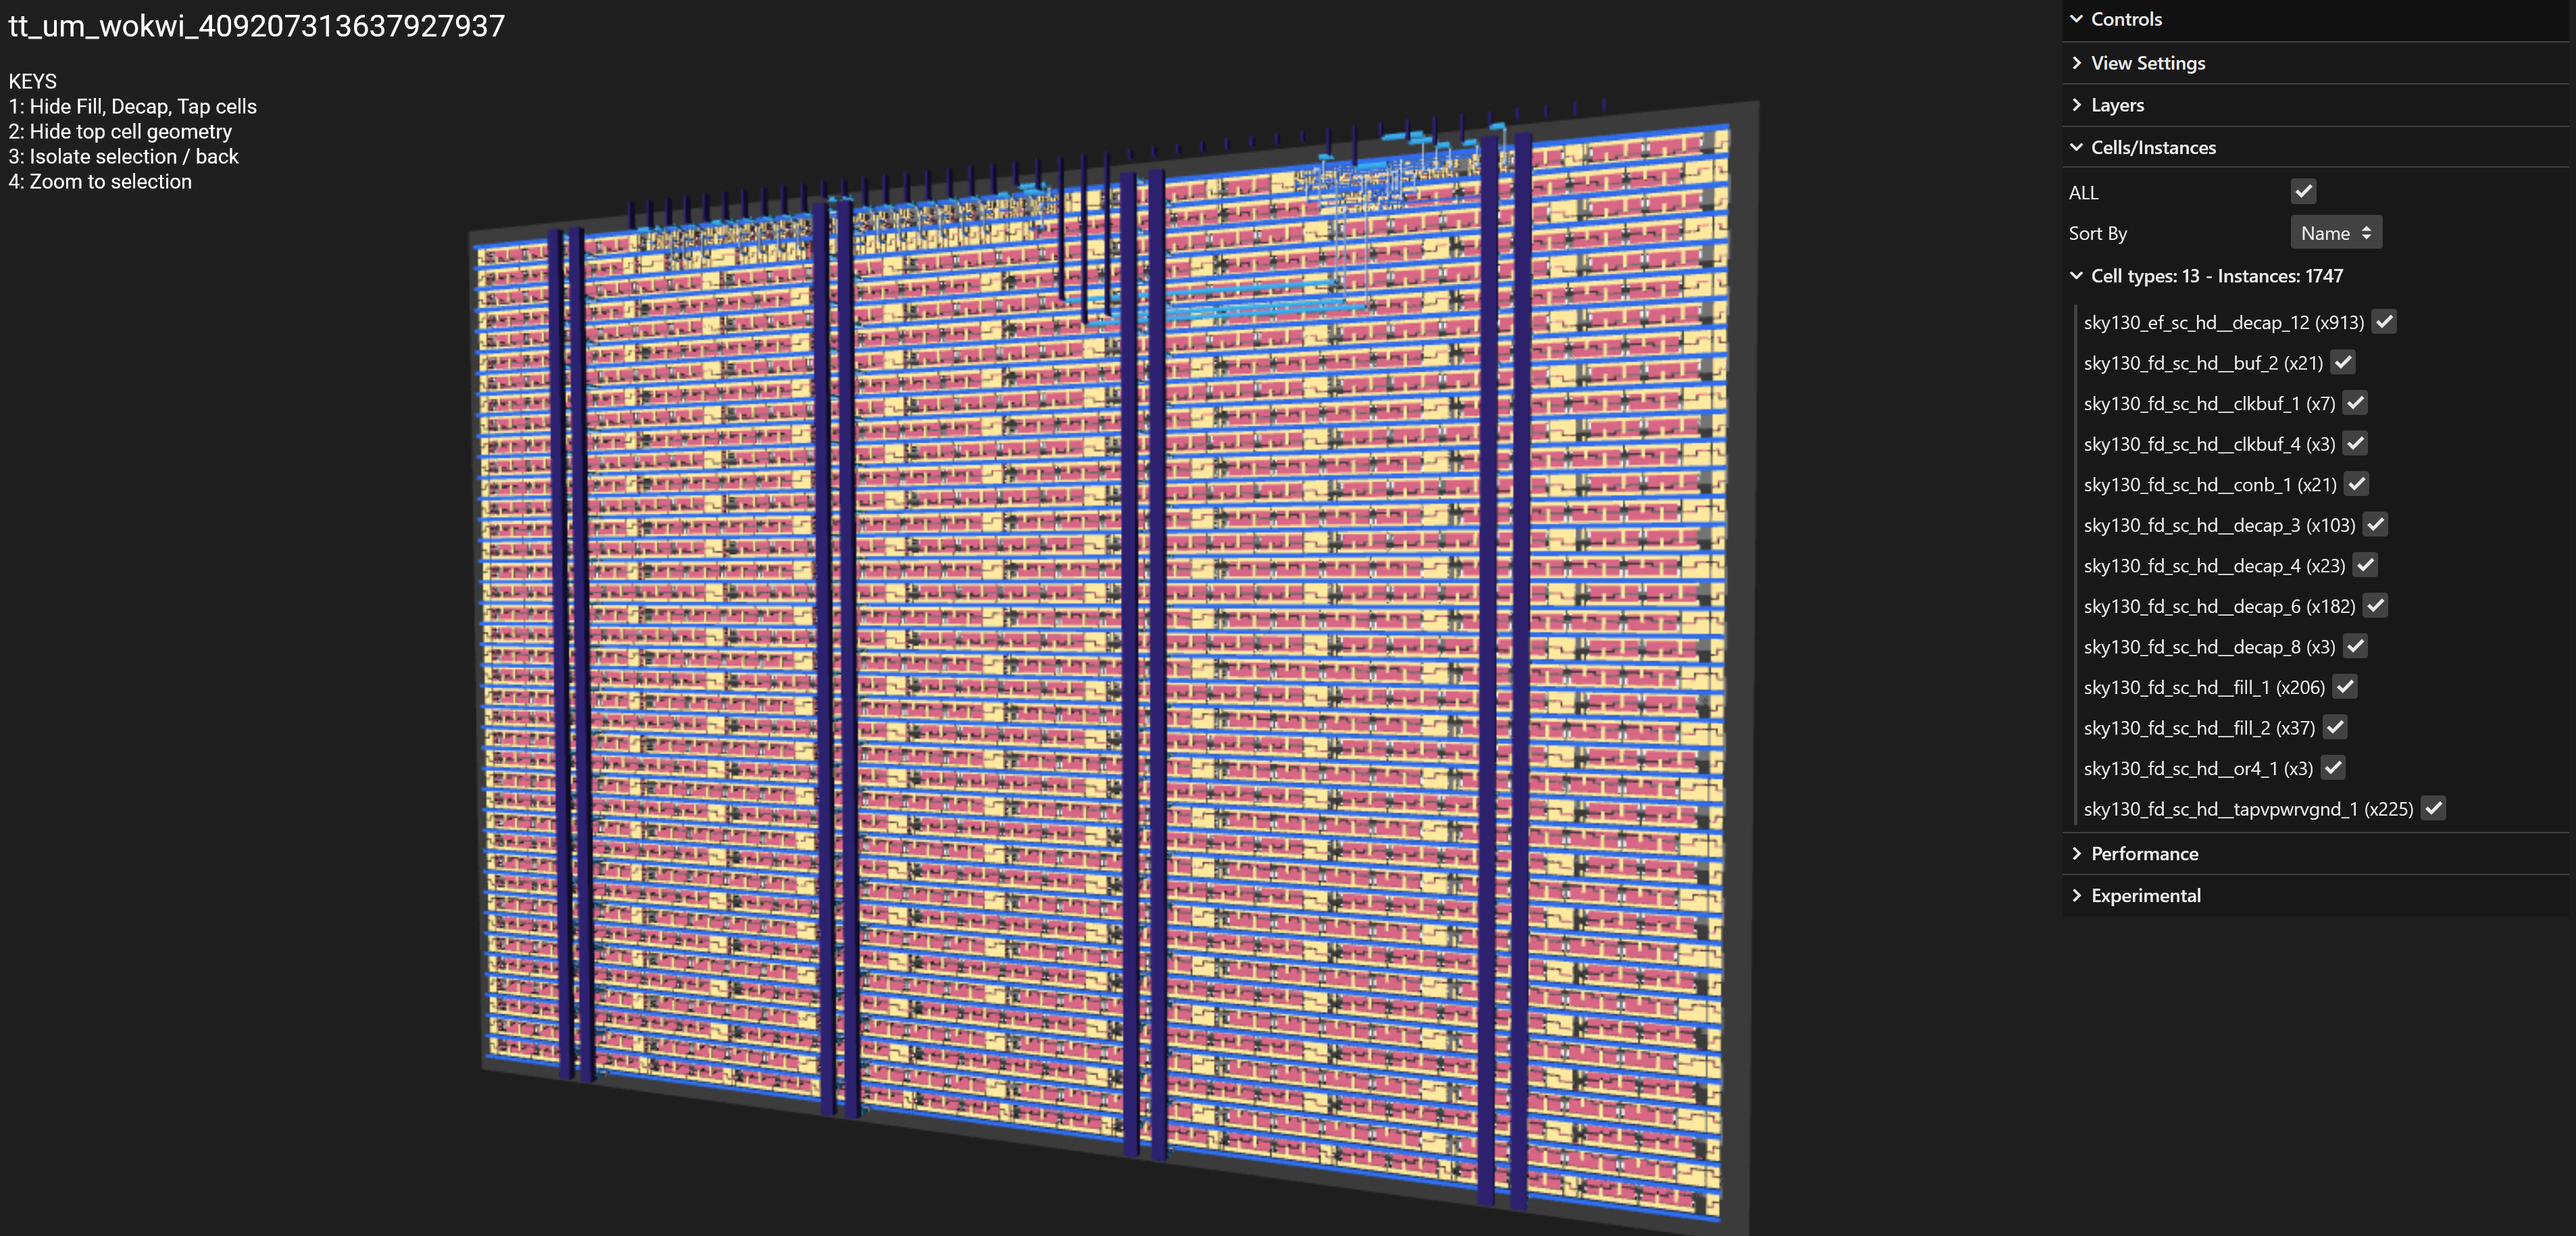
Zoomed out view of a tile
Controls
Keyboard
- Hide Fill, Decap, Tap cells.
- Hide top cell geometry.
- Isolate selection/back.
- Zoom to selection.
Mouse
- Use mouse wheel or zoom gesture to zoom.
- Pan and tilt by clicking and dragging.
- Move tile with shift + left click & dragging.
Additional options
- Toggle layer visibility with the checkboxes under the “Layers” section.
- Toggle cell visibility with the checkboxes under the “Cells/Instances” section.
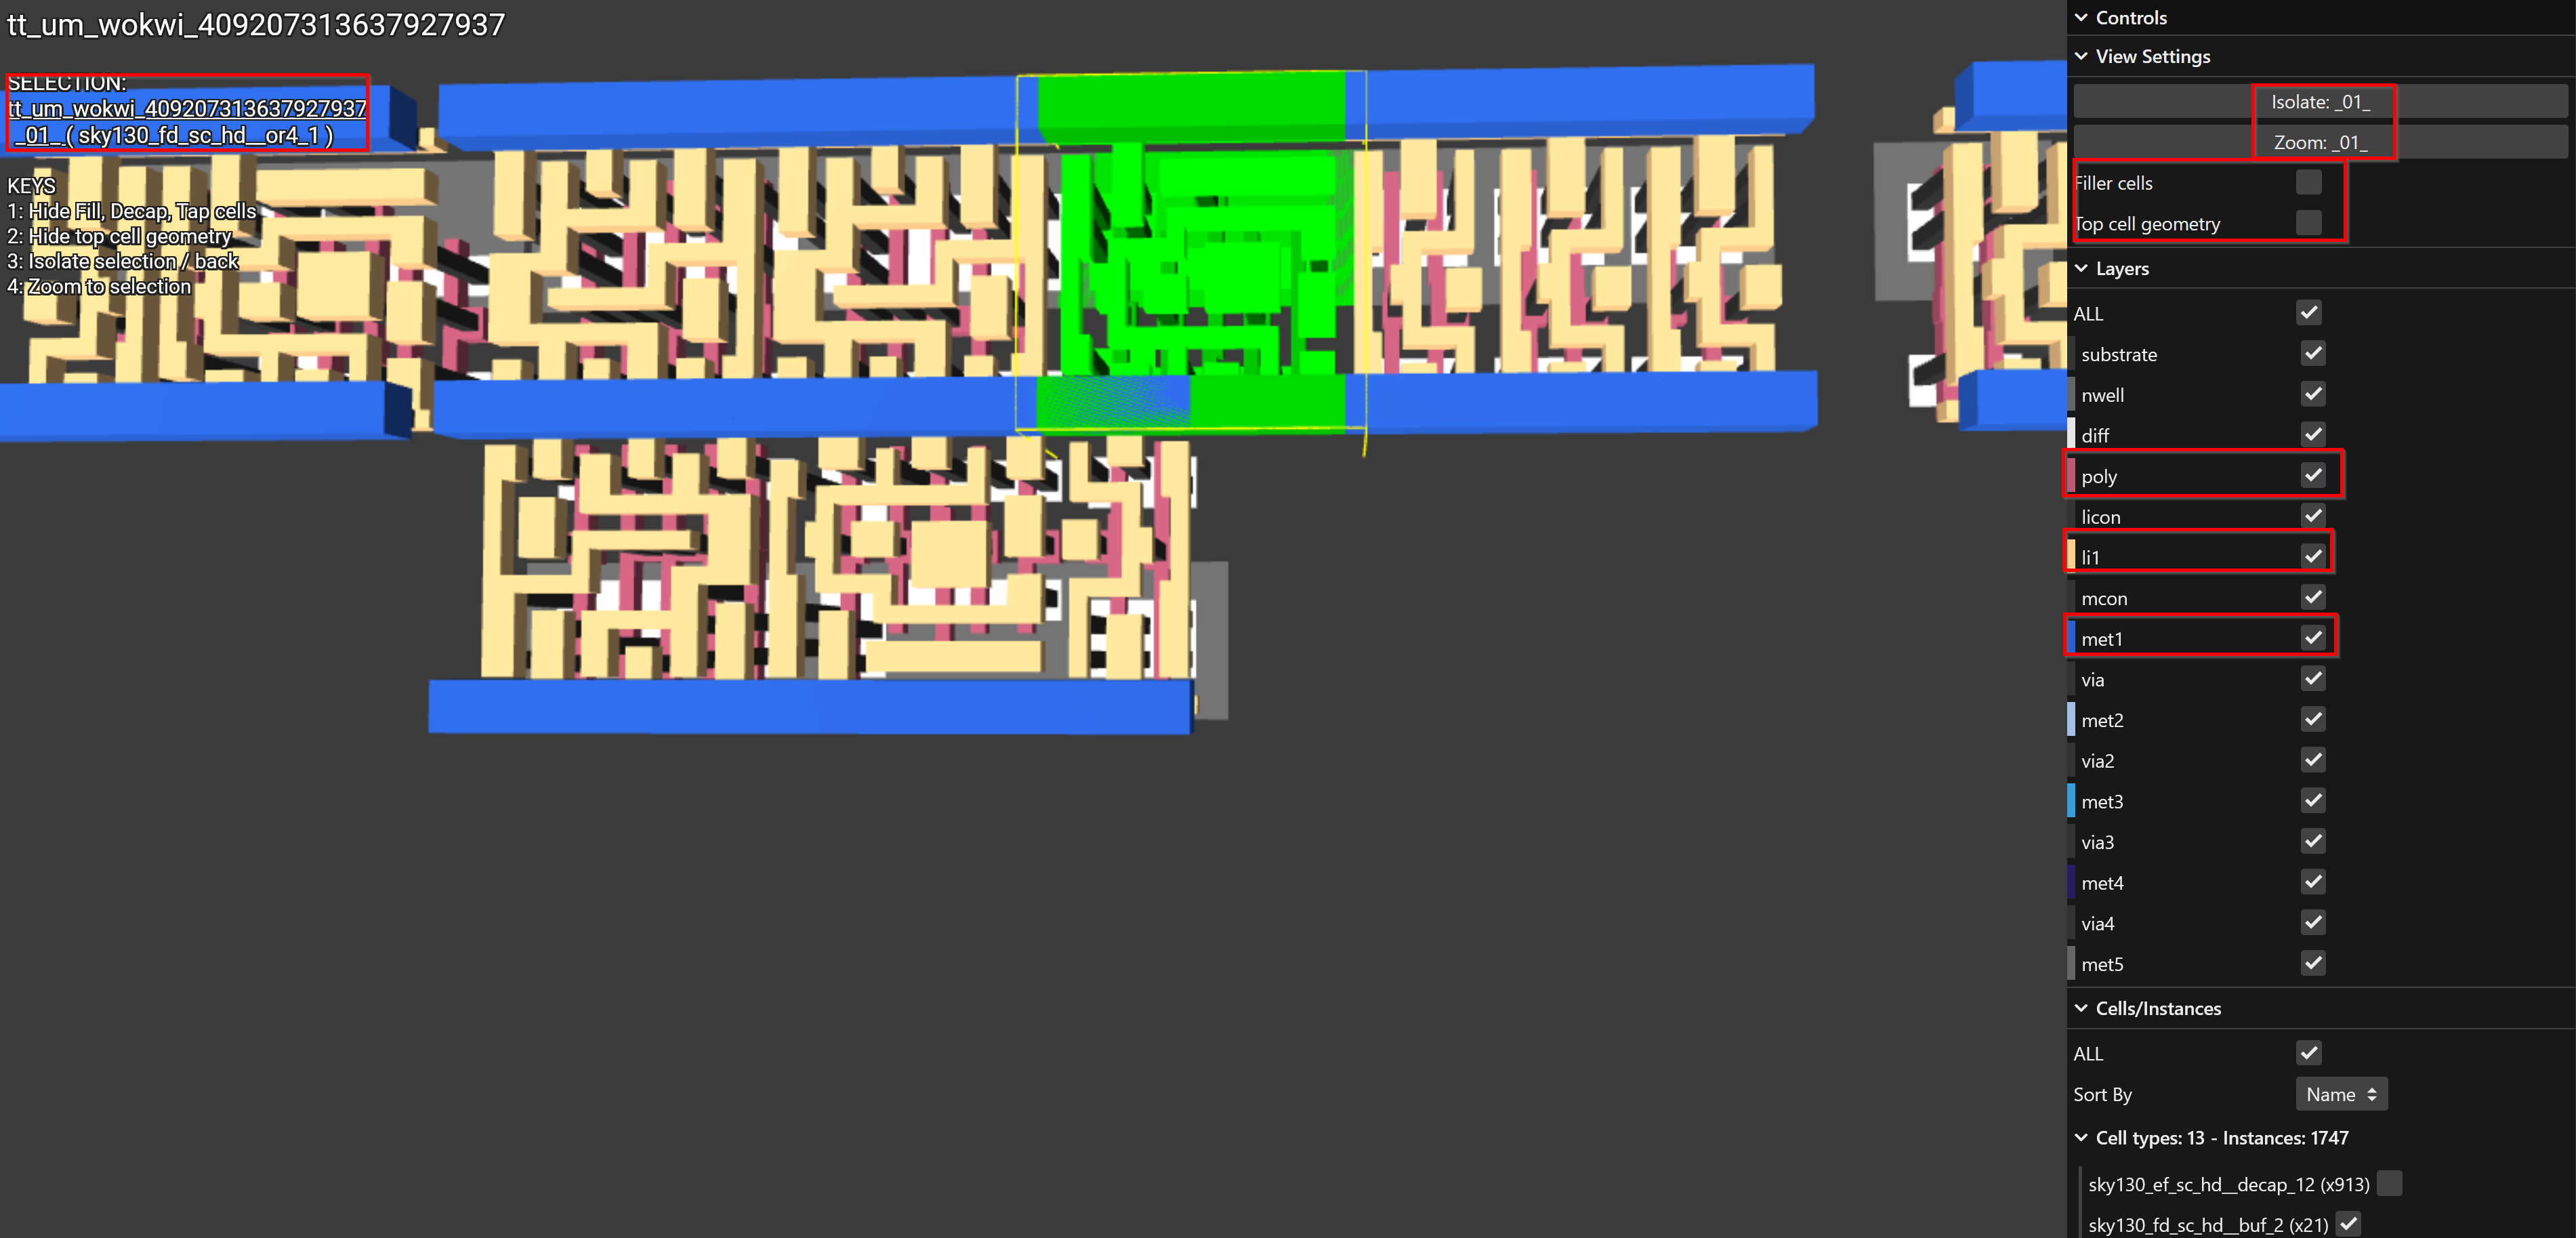
Zoomed in view of a sky130A OR gate
If you have time, try these next steps
- Check out our video on how the GitHub action works behind the scenes.
- Revisit
test.pyand implement actual testing - the code is there, but you’ll need to provide some reference screenshots so that it can compare the output with what you expect! - Generate a video of your design via GitHub actions - you can check out these tools and try to integrate one into your project:
- PNG/MP4 output with VGA Simulator
- GIF output with Verilator VGA Simulator